

How to Make Lip Plumper at Home: 4 Easy Recipes

Yes, you can make an effective lip plumper at home. The results are temporary, but they’re real. Two pathways create the effect: irritant ingredients like cinnamon, cayenne, and menthol trigger mild inflammation that increases blood flow and causes tissue to swell slightly, while humectants like hyaluronic acid and glycerin draw water into the lip surface and smooth fine lines for a visually fuller look. According to TheBeautyFoodie, most formulas begin working within 2–5 minutes, with visible peak effect around 10–15 minutes.
Before you mix anything:
- Patch test every recipe on your inner arm 24 hours before applying to lips.
- Irritant-based blends (cinnamon, cayenne) should be used only occasionally and sparingly.
- Rinse immediately with cool water if you feel intense burning or see prolonged redness.
- Humectant formulas (hyaluronic acid, glycerin) are gentle enough for daily use.
Lumeracosmetica covers both approaches in depth at Lumeracosmetica for readers who want a science-backed reference alongside their DIY experiments.
Key Takeaways
Making an effective lip plumper at home is straightforward when you match the right ingredient to your goal and follow basic safety rules every time.
| Point | Details |
|---|---|
| Two effect pathways | Irritants increase blood flow; humectants draw water in. Choose based on your skin sensitivity. |
| Patch test every time | Test on your inner arm 24 hours before applying any new recipe to your lips. |
| Limit irritant frequency | Cinnamon and cayenne recipes should be used no more than 1–2 times per week to protect the lip barrier. |
| Exfoliate and layer | Gentle exfoliation before application and a clear gloss topcoat after extend visible fullness significantly. |
| Lumeracosmetica option | For a calibrated, daily-safe formula, see Lumeracosmetica’s lip plumper range. |
Table of Contents
- How to make lip plumper at home: 4 step-by-step recipes
- How these recipes actually work, and how to use them safely
- How to apply your homemade plumper and make the effect last
- What to do when it burns, dries out, or just doesn’t work
- A quick note on balancing results with lip health
- Lumeracosmetica’s ready-made alternative to DIY plumpers
- Sources
How to make lip plumper at home: 4 step-by-step recipes
These four recipes cover both effect pathways. Measurements are for a single use unless noted. HowStuffWorks and Makeupious both confirm these ingredient categories as the most commonly used in DIY formulas.
1. Cinnamon tingle paste
Ingredients: 1 teaspoon coconut oil or sweet almond oil, ¼ teaspoon ground cinnamon.
Mix thoroughly in a small bowl. Apply a thin layer to clean, dry lips. Leave on for 3–5 minutes, then rinse with cool water and follow with a plain balm or occlusive. Do not exceed 5 minutes of contact time. Safety note: cinnamon is a known sensitizer; if you feel sharp stinging rather than a mild tingle, rinse immediately.
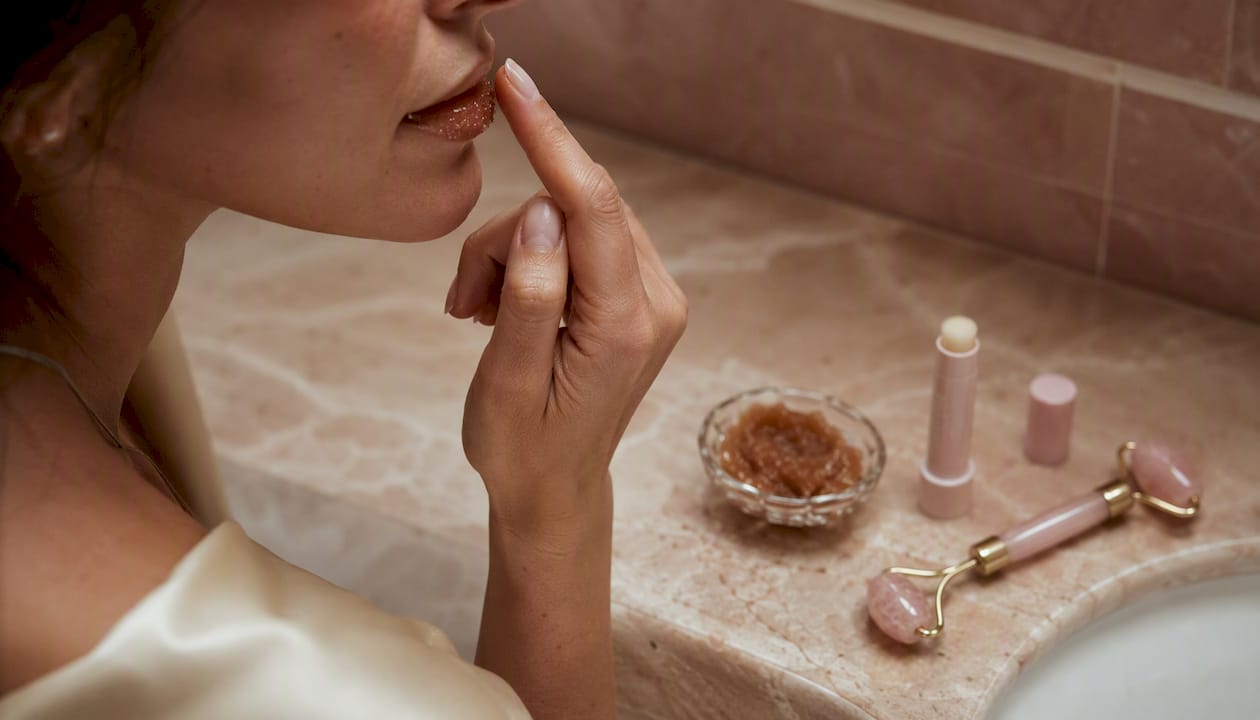
Optional tint: stir in a tiny pinch of beetroot powder before applying. Shelf life: use fresh each time; the oil can go rancid within a few days if stored at room temperature.
2. Hyaluronic acid + glycerin gloss
Warm the gloss base slightly by rolling the container between your palms. Stir in glycerin and hyaluronic acid serum until fully blended. Apply as a leave-on gloss. No rinse needed. Reapply throughout the day. This formula is gentle enough for daily use and works well as a base under other products.
Shelf life: up to 2 weeks in a small, lidded container stored away from heat and light.
3. Cayenne pepper tingle oil
Ingredients: 1 tablespoon jojoba oil or olive oil, a single small pinch of cayenne pepper (roughly 1/16 teaspoon).
Stir well and let sit for 2 minutes so the capsaicin disperses. Apply a very thin layer to lips only. Maximum contact time: 3 minutes. Rinse with cool water, then apply aloe vera gel or a plain occlusive. Never apply near the eyes or on broken skin. If burning is intense, apply a small amount of whole milk or plain yogurt to the area before rinsing — the fat helps neutralize capsaicin faster than water alone.
Shelf life: up to 1 week refrigerated in a sealed container.
4. Beeswax balm base with peppermint
Ingredients: 1 tablespoon beeswax pellets, 1 tablespoon coconut oil, 3–4 drops peppermint essential oil.
Melt beeswax and coconut oil together in a small heatproof bowl set over simmering water (double-boiler method). Remove from heat, let cool for 90 seconds, then stir in peppermint oil. Pour into a small tin or lip balm tube. Allow to set fully (about 20 minutes at room temperature). Apply as a leave-on balm. Peppermint essential oil is potent; do not exceed 4 drops per tablespoon of base. Menthol sensitivity is common — patch test is non-negotiable here.
Shelf life: up to 4 weeks stored in a cool, dry place.
How these recipes actually work, and how to use them safely
Understanding the mechanism helps you use these recipes smarter. The Los Angeles Times explains it clearly: irritant-based ingredients like capsaicin, cinnamon, and menthol cause a micro-inflammatory response that increases local blood flow, making lips appear temporarily swollen and flushed. Humectants like hyaluronic acid and glycerin work differently. They draw water from the deeper skin layers and the environment into the lip surface, smoothing fine lines and improving light reflection so lips look fuller without any inflammation at all.
Lip skin is thinner than facial skin and has no oil glands, which means barrier disruption from repeated irritant exposure can cause chronic peeling and heightened sensitivity over time. That’s the real risk with daily cinnamon or cayenne use.
Safety checklist:
- Always patch test on your inner arm 24 hours before first use.
- Start with the smallest possible amount of irritant and dilute further if needed.
- Limit irritant-based recipes to 1–2 times per week maximum.
- Follow every tingle treatment with an occlusive moisturizer (plain petroleum jelly works well).
- Stop use immediately if severe burning or swelling lasts longer than 24 hours, and consult a dermatologist.
- Check for known allergies to cinnamon, capsicum, or essential oils before mixing. IPSY specifically recommends ingredient checks to avoid allergic reactions.
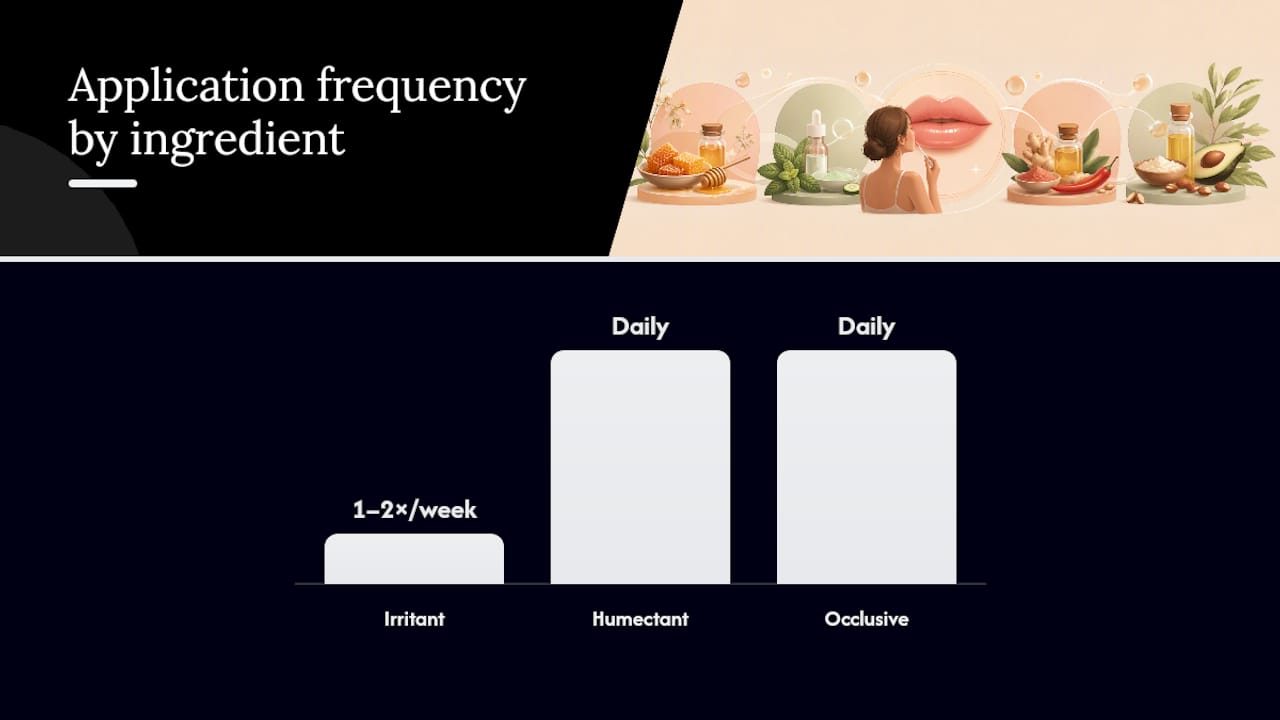
| Ingredient type | Example ingredients | Mechanism | Frequency |
|---|---|---|---|
| Irritant | Cinnamon, cayenne, menthol | Increases blood flow via mild inflammation | 1–2x per week max |
| Humectant | Hyaluronic acid, glycerin | Draws and holds water in lip tissue | Daily use safe |
| Occlusive | Beeswax, petroleum jelly | Seals in moisture, protects barrier | Daily use safe |
Pro Tip: Layer your actives strategically. Use a humectant gloss daily and reserve a tingle recipe for occasions when you want maximum visible effect. Always finish a tingle treatment with an occlusive to seal the barrier and reduce post-treatment dryness.
How to apply your homemade plumper and make the effect last
Prep matters as much as the formula itself. For more on making lips look fuller step by step, Lumeracosmetica has a detailed visual guide worth bookmarking.
Before you apply:
- Exfoliate lips gently with a damp washcloth or a sugar-and-honey scrub once or twice a week. Never exfoliate right before a tingle treatment on already-sensitized skin.
- Apply a thin layer of plain lip balm and let it absorb for 2 minutes before using a humectant gloss.
- Skip exfoliation on the same day you plan to use a cayenne or cinnamon recipe.
Application sequence:
- Apply a thin, even first layer of your chosen recipe.
- Press lips together gently once to distribute.
- Wait for peak effect (roughly 10–15 minutes for most formulas, per TheBeautyFoodie’s timing guidance).
- Blot lightly with a tissue, then layer a clear or lightly tinted gloss on top to lock in moisture and extend the look.
Makeup layering tips for longer-lasting fullness:
- Use a lip liner one shade deeper than your natural lip tone and trace just outside the natural lip line at the center cupid’s bow and lower lip only. How to line lips to look fuller naturally covers this technique in detail.
- Concentrate gloss on the center of both lips, not edge to edge.
- Place a tiny dot of a lighter, shimmery shade at the center of the lower lip.
- Avoid matte formulas as a topcoat over a plumper. Matte products flatten the light-reflective effect that makes the plumping visible.
What to do when it burns, dries out, or just doesn’t work
If it burns intensely: Rinse with cool water for at least 60 seconds. Apply aloe vera gel or plain petroleum jelly. Do not rub. Monitor for 24 hours. If swelling or redness persists, see a dermatologist.
If lips peel or become chronically dry: Stop all irritant-based recipes immediately. Switch to the hyaluronic acid + glycerin gloss exclusively for at least one week. Add a nightly occlusive layer (petroleum jelly or a thick balm) before bed. Repeated irritant exposure is a known cause of barrier damage, as the Los Angeles Times notes.
If you see little visible effect: Check your dilution first. Exfoliate before your next attempt. Try switching actives: menthol tends to produce a more noticeable tingle than cinnamon for some people, while hyaluronic acid works better for those with naturally drier lips. Makeup contouring (liner, gloss placement, highlight dot) often adds more visible fullness than any topical active alone.
Safer alternatives when irritants aren’t working for you:
- Leave-on hyaluronic acid gloss (Recipe 2 above) used daily.
- Peptide-based balms, which dermatologists note can improve surface smoothness over time without repeated irritation.
- Makeup contouring techniques instead of repeated tingle treatments.
A quick note on balancing results with lip health
DIY experimentation is worth doing when you pair it with real safety habits. The tingle is satisfying, but it signals inflammation, and inflammation repeated daily adds up. My honest recommendation: treat irritant recipes as an occasional tool, not a daily ritual, and lean on humectant formulas for everyday fullness. Lumeracosmetica’s natural lip plumper guide is a solid reference for readers who want the science behind both approaches without the guesswork.
Lumeracosmetica’s ready-made alternative to DIY plumpers
Mixing your own formula is rewarding, but the margin for error is real. Lumeracosmetica formulates its lip products with humectant-forward blends, including hyaluronic acid and glycerin, at concentrations calibrated for daily safety rather than improvised at home. Where DIY recipes rely on your measuring spoon, Lumeracosmetica’s formulas go through lab-quality production with low-ppm active irritants and built-in patch-test guidance.
Lumeracosmetica checks every one of those boxes. Browse the full range of derm-backed lip plumpers and find the formula that fits your routine.
Sources
- Do Lip Plumpers Work? Facts on Hyaluronic Acid & Lip Gloss - Los Angeles Times
- Lip plumpers | HowStuffWorks
- How Does Lip Plumper Work? Science Explained | TheBeautyFoodie
- How Does Lip Plumper Work? The Ingredients & Science Behind the Plump | IPSY
- How to Make Lip Plumper | 10 Easy Methods (2026)


