

Four Step Makeup Method to Make Lips Look Bigger Without Surgery

The fastest way to make your lips look bigger is by layering four steps: gentle exfoliation, a micro-lined or blurred lip liner just past your natural edge, a lighter shade in the center, and gloss placed on the highest points. Add a capsicum or hyaluronic acid plumper for temporary extra swelling. None of this is permanent, so daily hydration, SPF, and collagen-supporting habits matter just as much for lips that look full over the long run.
TL;DR:
- Layering a micro-lining technique with blending and shading creates a visible fuller lip effect without overdrawn lines.
- Hydrating ingredients like hyaluronic acid support long-term fullness, while vasodilators provide only temporary swelling.
- Patch testing new plumping products is essential to avoid irritation, especially with cinnamon and capsicum-based formulas.
- Avoid unregulated suction devices and hyaluron pens, as they pose risks of permanent damage and asymmetry.
- Consistent hydration, sun protection, and skincare habits are crucial for maintaining natural lip volume over time.
Table of Contents
- How Do I Make My Lips Look Bigger With Makeup?
- Which Lip Plumpers And Ingredients Actually Work?
- Do Natural Lip Plumping Remedies Actually Work?
- What Daily Habits Keep Lips Looking Fuller Long Term?
- What Lip Enhancement Methods Should You Avoid?
- Who’s Behind This Guide, and How Does Luméra Fit In?
- A Realistic Take on Fuller-Looking Lips
- Try the Perfect Kiss Lipstick for Buildable, Fuller-Looking Color
- Sources
How Do I Make My Lips Look Bigger With Makeup?
Makeup is still the most reliable, zero-risk way to answer the question “how do I make my lips look bigger” without touching a needle. The trick isn’t one product. It’s a sequence, and skipping steps is why most people’s attempts look muddy or uneven instead of fuller.
1. Start with exfoliation and hydration. Flaky, dry lips grab color unevenly and make any liner look patchy. A soft toothbrush, a damp washcloth, or a gentle sugar scrub for 10 to 15 seconds removes dead skin and boosts surface circulation, which gives lips a slightly plumper look on its own, even before you pick up a liner. Follow immediately with a hydrating balm so the surface isn’t tacky.
2. Choose your liner shade. Pick a lip liner that matches your natural lip color, or go one shade deeper if you want more contour definition. A liner that’s too dark or too pink relative to your skin tone reads as an obvious line rather than a natural edge, which undercuts the entire effect.
3. Use the micro-lining or blurred lip technique. This is the single most useful skill in this article. Instead of drawing one continuous line, place four or five tiny dashes just outside your natural lip line: one at the center of the top lip, one at each corner of the top lip, and two along the bottom. Then take a small, fluffy brush and blend those marks inward and along the lip line so the edge softens into a gradient instead of a hard border. Makeup artists who work with celebrities like Dua Lipa use exactly this micro-lining technique to add visible size without the telltale “overdrawn” look that reads fake in photos and in person.
4. Know when to overline instead. If you want a bolder change, extend the liner up to 2 millimeters beyond your natural line, but stay light handed on the upper lip’s peaks and heavier on the bottom center, where extra width reads as natural fullness rather than distortion.
5. Shade the perimeter, lighten the center. Take a slightly deeper shade than your base lipstick and lightly diffuse it around the outer edge of your lips, then fill the center with a lighter tone. This darker-to-lighter gradient mimics the way light naturally falls on a fuller lip, and it’s the same shading logic makeup artists use to contour lips for a rounder look. Blend with a flat synthetic brush or your fingertip so there’s no visible line between the two shades.
6. Highlight strategically. Dab a touch of cream highlighter, a pearly eyeshadow, or a pale concealer onto your Cupid’s bow and the center of your bottom lip. Cream and liquid highlighters blend more seamlessly into lipstick than powder, which can look chalky over color. This is the same principle that makes contouring work anywhere on the face: light draws the eye forward, shadow pushes it back.
7. Place gloss where it catches light. Skip an all-over gloss layer and instead dot it onto the center of both the top and bottom lip. A high-shine formula amplifies the illusion of volume more than a satin finish, because it reflects more light off the highest points of the lip. If you want fullness with a bit more control, a satin gloss gives a softer glow that still reads as plumper without looking wet.
Here’s a quick reference for finish choice based on the effect you want:
| Finish | Perceived volume boost | Best for |
|---|---|---|
| High-shine gloss | Strongest | Evening looks, photos, bold statements |
| Satin gloss | Moderate | Daytime wear, subtler fullness |
| Cream lipstick with center gloss dot | Moderate to strong | Everyday wear with staying power |
| Matte lipstick alone | Weakest | Definition over volume |
A few tool notes that make a real difference in execution:
- A tapered synthetic lip brush gives more control for micro-lining than applying liner straight from the pencil.
- Cotton swabs are useful for cleaning up smudges at the corners without disturbing the rest of the shape.
- Apply products in this order: balm, liner, base color, contour shade, highlight, gloss. Reversing this sequence usually blurs the definition you just built.
- For asymmetry, correct the smaller side first by extending it slightly with liner rather than trying to shrink the larger side.
Pro Tip: If one side of your mouth is naturally fuller than the other (most people have at least slight asymmetry), line the smaller side about half a millimeter further out than the larger side. Your brain and camera will read them as matching.
Which Lip Plumpers And Ingredients Actually Work?
Lip plumpers fall into two categories that work in completely different ways, and confusing them leads to disappointing results or unnecessary irritation.
Irritant vasodilators like capsicum, cinnamon, and menthol work by increasing blood flow to the lips, which causes mild, temporary swelling. This is why your lips tingle or feel warm right after applying certain glosses. The effect is real but short lived: Healthline’s roundup of lip plumpers confirms that capsicum and cinnamon-based formulas create swelling through increased circulation rather than any structural change to the lip tissue, and the fullness fades within a few hours as blood flow returns to normal.
Hydration-based ingredients like hyaluronic acid and peptides work on a completely different timeline. Instead of causing swelling, hyaluronic acid draws moisture into the surface of the lip, which smooths fine vertical lines and makes lips look plumper simply because they’re better hydrated. Peptides support the skin’s own collagen production over time. Neither produces an instant dramatic change, but the improvement compounds with consistent daily use over weeks.
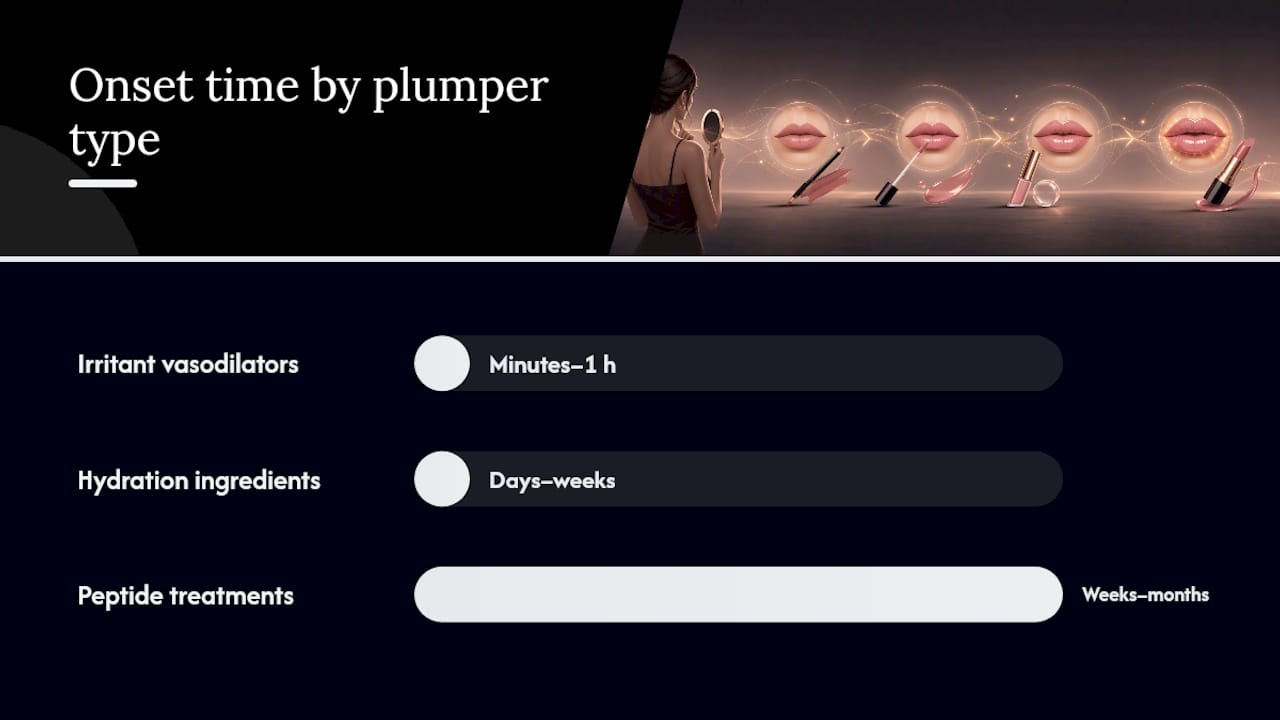
That timing difference matters when you’re picking a product for a specific occasion:
- Minutes to an hour: capsicum, cinnamon, menthol, and peppermint oil formulas.
- Days to weeks: hyaluronic acid serums and balms used consistently.
- Weeks to months: peptide-based lip treatments aimed at gradual collagen support.
Roughly a third of people who try strong vasodilator glosses report noticeable tingling or mild burning, which is expected and not automatically a sign of a reaction. The line between “working as intended” and “irritated” is where patch-testing earns its keep. Before using any new plumping product on your lips, apply a small amount to the inside of your wrist or just below your ear and wait 24 hours. If you see redness, swelling beyond the mild tingling described on the label, or itching, don’t use it on your lips. People with sensitive skin or a history of contact dermatitis should be especially cautious with cinnamon and capsicum formulas, since these are the most common triggers for allergic reactions in this category.
One caution that deserves to be stated plainly: skip suction devices and unregulated “hyaluron pens” entirely. They’re marketed as at-home alternatives to filler, but they work by forcing trauma or unregulated injection into lip tissue, and dermatologists have linked them to collagen breakdown, scarring, and lasting asymmetry. No topical gloss carries that risk. If you want to understand exactly what’s inside a plumping formula before you buy one, it’s worth reviewing how lip plumpers are formulated so you know what you’re reacting to if irritation shows up.
Do Natural Lip Plumping Remedies Actually Work?
DIY recipes can genuinely help you make thin lips look fuller naturally, but the effect is mild and temporary, and a few common ingredients can backfire if you’re not careful with dilution.
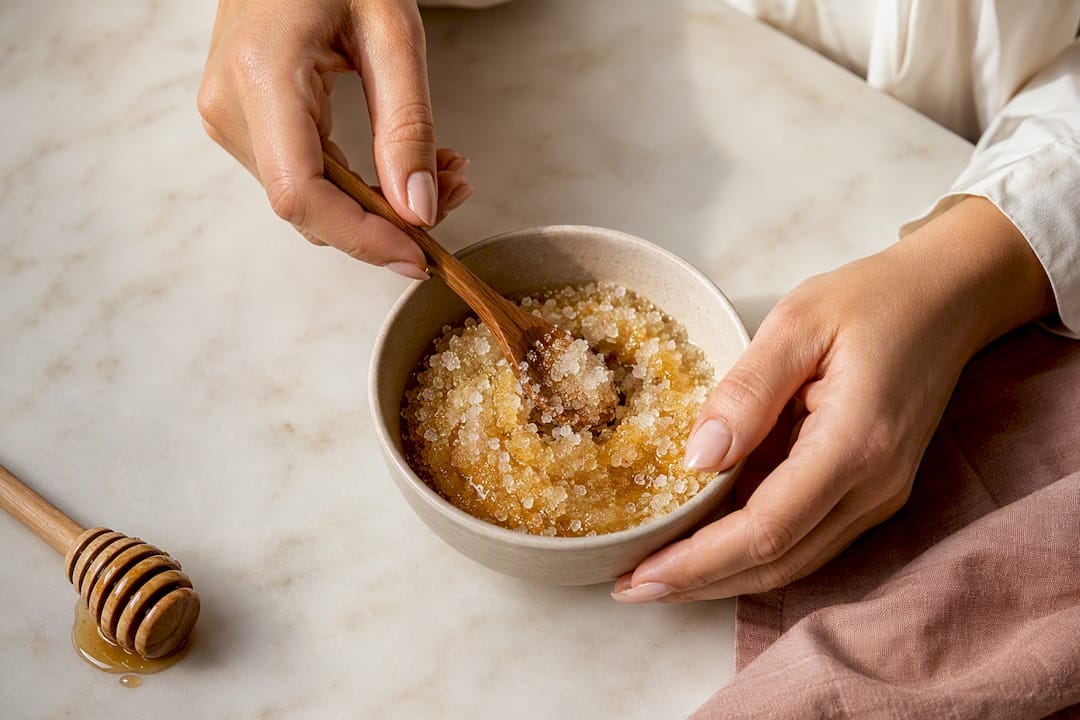
1. Sugar scrub. Mix one teaspoon of granulated sugar with a few drops of honey or olive oil. Massage gently onto lips for 10 to 15 seconds, then rinse with warm water and follow with balm. Two to three times a week is plenty; daily scrubbing can irritate the delicate skin instead of smoothing it.
2. Cinnamon or cayenne oil blend. Mix a pinch of ground cinnamon or cayenne with a full tablespoon of a carrier oil like coconut or olive oil. That dilution ratio matters: using the spice directly, or too little carrier oil, is a common cause of burning and peeling. Apply a thin layer, leave it on for no more than five minutes, and rinse thoroughly. Do a patch test first, since cinnamon is one of the more common lip irritants.
3. Hydrating balm choice. Look for balms built around shea butter, ceramides, or hyaluronic acid. Avoid heavy, straight beeswax or petroleum-only formulas if your goal is plumping. They seal moisture in, which is good for chapped lips, but they don’t actively hydrate the way humectant ingredients do, so they won’t contribute much to a fuller look on their own.
4. Massage and light exercises. Some people swear by gently massaging lips with a soft brush or trying puckering exercises to increase blood flow. There’s genuinely limited evidence that facial exercises change lip volume in any lasting way, so treat this as a nice-to-have warm-up before makeup, not a real plumping strategy.
Pro Tip: Do your sugar scrub or cinnamon treatment right before you apply makeup, not hours before. The mild swelling and smoothness fade within 30 to 60 minutes, so timing it right before your liner and gloss step stacks the temporary effect with the visual techniques for a noticeably fuller result.
If you want more detailed recipes with exact measurements, Luméra’s guide to DIY at-home lip plumper recipes walks through several variations with safety notes for sensitive skin.
What Daily Habits Keep Lips Looking Fuller Long Term?
Lips thin with age mainly because of collagen loss, and that process is largely why makeup tricks matter more the longer you wait to build a maintenance routine. Dermatologists point to hydration and sun protection as two of the simplest levers you actually control.
Water intake and a balanced diet support skin structure everywhere, lips included, and poor sleep shows up fast as dryness and a duller lip color. None of that is exciting advice, but it’s the baseline that makes every technique in this article work better.
- Apply a lip SPF (look for zinc oxide or a broad-spectrum chemical filter) every morning, since sun exposure accelerates the same collagen breakdown that thins lips with age.
- Layer a hyaluronic acid or peptide lip serum under your balm at night to support gradual smoothing.
- Reapply plain balm throughout the day, especially in dry or air-conditioned environments, since chronically dehydrated lips look thinner regardless of your skincare routine.
- Give topical hyaluronic acid and peptide products four to eight weeks of consistent use before judging results. This isn’t a next-day fix.
Lip thinning that people often attribute to aging can be worsened by dehydration and sun exposure, both of which are correctable with consistent habits rather than procedures.
One area worth a cautious mention: at-home LED and red-light lip devices. Some early research suggests red and infrared light may modestly stimulate collagen production, and a handful of at-home devices are marketed around that principle. The evidence is still limited and results, if any, are gradual and require consistent use over months. Treat these as a possible add-on to a hydration and SPF routine, not a replacement for it.
What Lip Enhancement Methods Should You Avoid?
The riskiest trend in this space isn’t a bad lipstick color. It’s DIY suction devices and unregulated hyaluron pens, both marketed as at-home filler alternatives. Dermatologists and plastic surgeons have documented cases of collagen breakdown, scarring, and lasting asymmetry tied directly to these tools, and most clinicians recommend avoiding them entirely regardless of how they’re marketed online.
A short safety checklist worth keeping in mind:
- Patch-test any new topical plumper on your inner wrist for 24 hours before applying it to your lips.
- Stop use immediately if you notice swelling beyond mild tingling, spreading redness, or itching that doesn’t fade within an hour.
- Never use a suction device or an unregulated injectable pen sold online without medical oversight.
- If you’re considering fillers, a lip flip, or lip blushing, only consult a board-certified dermatologist or plastic surgeon, and ask directly about their experience with lip procedures specifically, not just facial injectables generally.
- Ask about reversibility (hyaluronic acid fillers can typically be dissolved) and expected downtime before booking anything.
- Favor a practitioner who recommends a conservative first treatment and lets you build up gradually, rather than one who pushes maximum volume in a single visit.
If you’re exploring more comprehensive aesthetic options beyond makeup and topical products, a consultation covering the full range of facial procedures, including digital smile and lip assessments, can help clarify whether a non-surgical or surgical route fits your goals before you commit to anything.
Who’s Behind This Guide, and How Does Luméra Fit In?
This guide was written by Rebecca for Luméra Cosmetica, drawing on established dermatology and makeup-artist sourcing rather than guesswork, because advice about something you put on your face daily should hold up to scrutiny.
Some lip product formulations follow the techniques covered above: shade-matched liners for the micro-lining and blur method, hydrating formulas that support the long-term care routine, and plumping glosses built for safe layering rather than harsh irritation. If you want to go deeper on any single step, these guides expand on the specifics:
- How to make lips look bigger with lip liner naturally for a full walkthrough of shade selection and lining.
- How to line lips to look fuller naturally, step by step for practice drills if micro-lining feels tricky at first.
- What is lip plumper? Understanding the basics for a deeper ingredient breakdown.
- What is in lip plumper that makes it work for specifics on sensitivity and formulation.
A Realistic Take on Fuller-Looking Lips
Most advice on this topic oversells the drama and undersells the maintenance. Makeup and topical plumpers genuinely work, and the micro-lining technique in particular is a bigger upgrade than most people expect from a five-minute change to their routine. But nothing here replaces collagen your lips have already lost, and pretending otherwise sets people up to chase more aggressive, riskier options out of frustration.
The better mindset is layering: exfoliate and hydrate as a baseline, use makeup techniques for the daily visual boost, add a plumping gloss when you want more, and treat SPF and hydration as the quiet work that keeps your baseline from shrinking further. Patch-test anything new before it touches your lips, especially cinnamon or capsicum formulas. Try one new technique at a time so you actually know what’s working. If you land on a favorite combination, Luméra’s tutorial library has more granular breakdowns worth exploring next.
— Rebecca
Try the Perfect Kiss Lipstick for Buildable, Fuller-Looking Color
Every technique in this guide depends on picking the right base color and finish, and that’s exactly where the Luméra Perfect Kiss Lipstick was built to help. Its buildable formula lets you go sheer for a soft, everyday fuller look or layer up for more definition when you’re using the contour-and-highlight method, without settling into the creases that make thin lips look thinner by midday.
Pair it with a natural plumping gloss dotted onto your Cupid’s bow and lower center point, and you’ve got the full system this article walks through: liner, buildable color, strategic shine. If you’re ready to put the micro-lining and shading techniques into practice with a shade actually matched to your skin tone, shop the Perfect Kiss Lipstick and start building your everyday routine from there.
Sources
- Dua Lipa’s Makeup Artist on the Micro-Lining Technique That Instantly Gives You Bigger Lips | Vogue
- 11 Ways to Plump Thin Lips
- 11 Ways to Plump Your Lips, from DIY Drugstore to Dermatologist
- Surgical and nonsurgical options to plump up your lips


