

5 DIY At-Home Lip Plumper Recipes That Actually Work

Yes, you can get a fuller-looking pout at home, no injections required. The best at-home lip plumper recipes use mild natural irritants like cinnamon, cayenne, or peppermint to increase blood flow and cause a brief, harmless swelling, or humectants like hyaluronic acid to draw moisture into the lip tissue for a softer, plumper appearance. The catch is that these effects are genuinely temporary:
- Irritant-based plumpers (cinnamon, cayenne, peppermint): effects peak within a few minutes and typically fade within 15–30 minutes, per Healthline’s lip-plumping guide
- Hydration-based plumpers (hyaluronic acid, jojoba oil): effects are subtler but last slightly longer as long as the balm stays on
- Always patch-test any new recipe on your inner forearm before applying it to your lips — cinnamon and cayenne can cause real irritation in sensitive skin
These are short-term occasional fixes, not permanent solutions. If you want a fuller lip for photos or a night out, they work well. If you’re expecting clinical-filler results, you won’t find them here.
Key Takeaways
DIY lip plumpers work by triggering temporary blood flow or surface hydration, and the patch-test step is the single most important safety measure before trying any recipe.
| Point | Details |
|---|---|
| Effects are temporary | Irritant-based plumpers last 15–30 minutes; hydration-based effects last while the product is worn. |
| Patch-test every new recipe | Apply to your inner forearm 24 hours before lip use to catch reactions to cinnamon, cayenne, or essential oils. |
| Always follow with a humectant | Apply hyaluronic acid or jojoba balm after any irritant-based plumper to prevent dryness and extend a smooth finish. |
| Consult a dermatologist if needed | Persistent redness, peeling, or spreading rash after use warrants professional advice before continuing. |
| Lumeracosmetica’s Perfect Kiss Lipstick | A formulated, consistent alternative for readers who want reliable plumping results without DIY batch variation. |
This article is general information, not a substitute for advice from a qualified doctor. Consult a qualified healthcare professional about your own circumstances before acting on anything here.
Table of Contents
- What are the best at-home lip plumper recipes you can make today?
- Why do DIY plumpers make lips look fuller?
- How to prepare your lips and apply plumper for the best results
- Safety rules, patch-test steps, and when to call a doctor
- How to store homemade plumpers and what they cost to make
- What research and dermatologists say about DIY lip plumpers
- The routine that actually holds up
- Lumeracosmetica’s ready-made alternative for consistent results
- Sources
What are the best at-home lip plumper recipes you can make today?
Five recipes below, ordered from gentlest to most potent. Each includes exact amounts, steps, storage notes, and a per-recipe safety reminder. These DIY formulas are kitchen-friendly and beginner-safe when you follow the dilution guidance.
| Recipe | Key Active | Effect Duration | Shelf Life |
|---|---|---|---|
| Cinnamon scrub plumper | Cinnamon powder | effects last several minutes | 1 week (refrigerated) |
| Cayenne + olive oil balm | Cayenne pepper | 15–30 minutes | 2 weeks (cool, dark) |
| Peppermint tinted gloss | Peppermint essential oil | effects last several minutes | 3–4 weeks |
| Hyaluronic moisturizing balm | Hyaluronic acid | Subtle, lasts while worn | 4 weeks (cool, dark) |
| Sugar scrub + quick tinted gloss | Sugar + peppermint | 10–15 minutes post-scrub | 1 week (scrub); 3–4 weeks (gloss) |
Recipe 1: Cinnamon scrub plumper
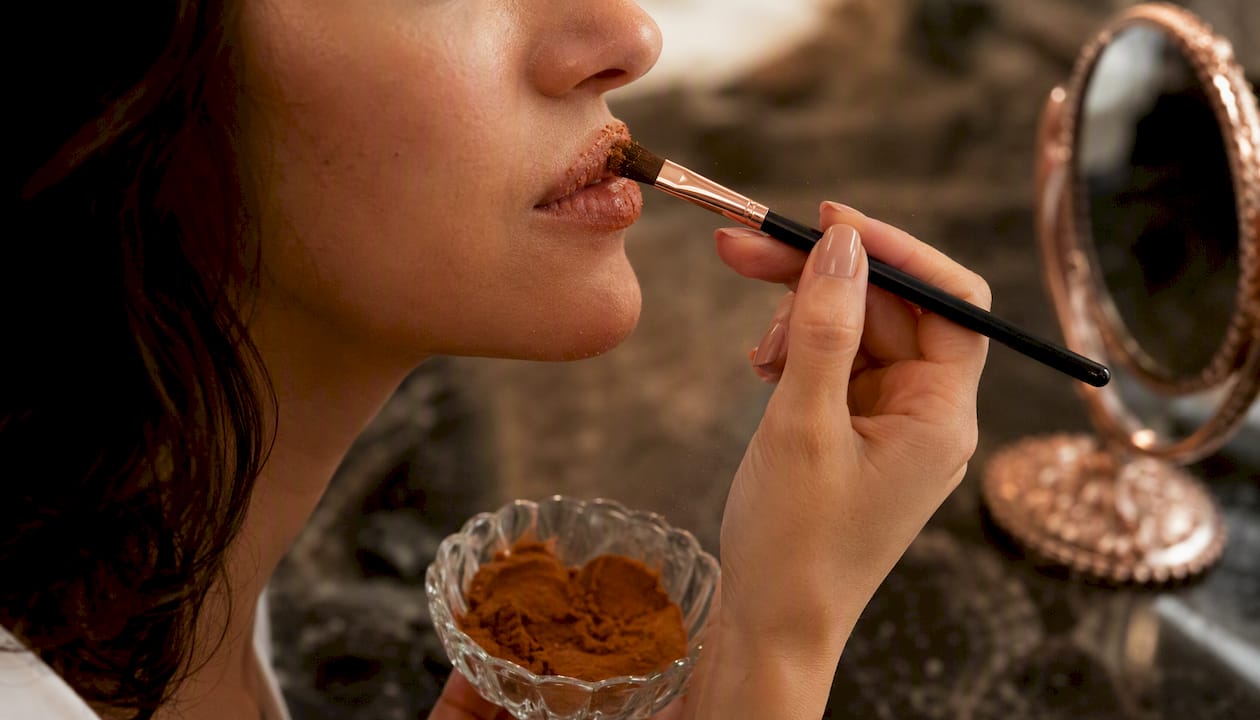
Ingredients: 1 teaspoon coconut oil, ½ teaspoon cinnamon powder, ½ teaspoon granulated sugar
- Mix all three ingredients in a small bowl until a paste forms.
- Apply a pea-sized amount to lips using a clean fingertip or soft toothbrush.
- Massage gently in small circles for 30–60 seconds.
- Leave on for 2 minutes, then rinse with warm water.
- Follow immediately with a moisturizing balm.
Storage: Airtight jar, refrigerated, up to 1 week. Safety tip: Cinnamon is a known skin sensitizer. Patch-test on your inner forearm 24 hours before lip use.
Recipe 2: Cayenne + olive oil balm
Ingredients: 2 tablespoons olive oil, ¼ teaspoon cayenne pepper, 1 teaspoon beeswax pellets (optional, for a firmer texture)
- Warm olive oil gently in a small saucepan over low heat — do not boil.
- Stir in cayenne pepper and mix thoroughly.
- If using beeswax, add it now and stir until melted. Remove from heat.
- Pour into a small tin or lip balm tube and allow to cool completely.
- Apply a thin layer to lips, leave for 2–3 minutes, then wipe off any excess.
Storage: Cool, dark place, up to 2 weeks. Safety tip: Cayenne is the most potent irritant in this list. Start with ⅛ teaspoon if you have sensitive skin, and never use near broken skin.
Recipe 3: Peppermint tinted gloss
Ingredients: 1 tablespoon clear lip gloss base (or petroleum jelly), 2–3 drops peppermint essential oil, a small pinch of cosmetic-grade mica or lip-safe pigment (optional)
- Spoon the gloss base into a small bowl.
- Add 2 drops of peppermint oil — no more than 3 drops per tablespoon of base.
- Stir in pigment if using, until evenly blended.
- Transfer to a small pot or empty gloss tube.
Storage: Room temperature, up to 3–4 weeks. Safety tip: Essential oils must always be diluted in a carrier. Never apply undiluted peppermint oil directly to lips.
Recipe 4: Moisturizing hyaluronic balm
Ingredients: 1 tablespoon jojoba oil, ½ teaspoon hyaluronic acid serum (store-bought), 1 teaspoon shea butter
- Melt shea butter gently in a double boiler or microwave in 10-second bursts.
- Stir in jojoba oil, then allow to cool slightly (not solidified).
- Fold in hyaluronic acid serum and mix until smooth.
- Pour into a small container and refrigerate for 20 minutes to set.
- Apply generously to lips as a base or overnight treatment.
Storage: Cool, dark place, up to 4 weeks. Safety tip: This recipe contains water-phase ingredients (the serum), so watch for any off smell or color change and discard if either appears.
Pairing plumping actives with a humectant like hyaluronic acid is something Allure’s beauty editors specifically recommend to prevent the drying effect that irritant-based plumpers can cause.
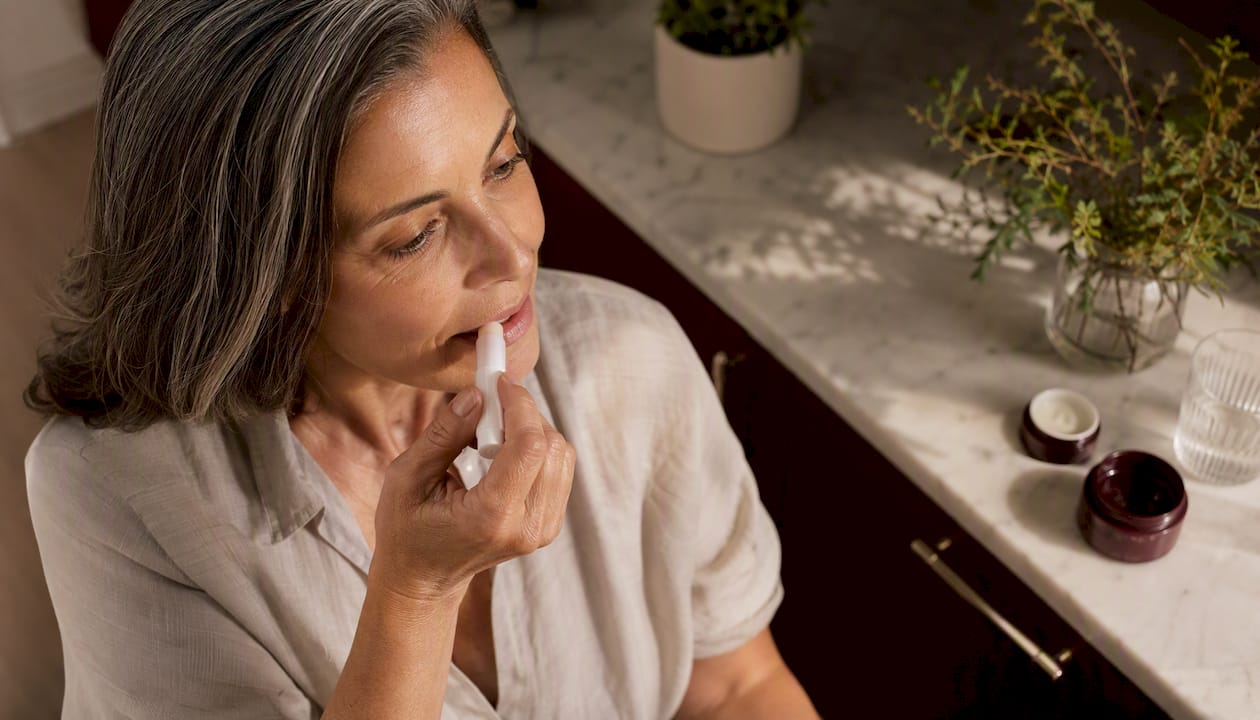
Recipe 5: Sugar scrub + quick tinted gloss combo
Ingredients (scrub): 1 teaspoon white sugar, ½ teaspoon honey, ½ teaspoon rose water
Ingredients (gloss): 1 tablespoon clear gloss base, 2 drops peppermint oil, lip-safe pigment to taste
- Mix sugar, honey, and rose water into a paste. This is a variation on the exfoliating scrub popularized by Priyanka Chopra, which uses sea salt and glycerin for a similar effect.
- Apply the scrub to lips, massage for 30–45 seconds, then rinse.
- Pat dry and apply the tinted peppermint gloss immediately.
Storage: Scrub: refrigerated, 1 week. Gloss: room temperature, 3–4 weeks. Safety tip: Honey can cause reactions in people with bee-product allergies. Substitute agave syrup if needed.
Why do DIY plumpers make lips look fuller?
Two mechanisms are at work, and they’re worth understanding so you can choose the right recipe for your situation.
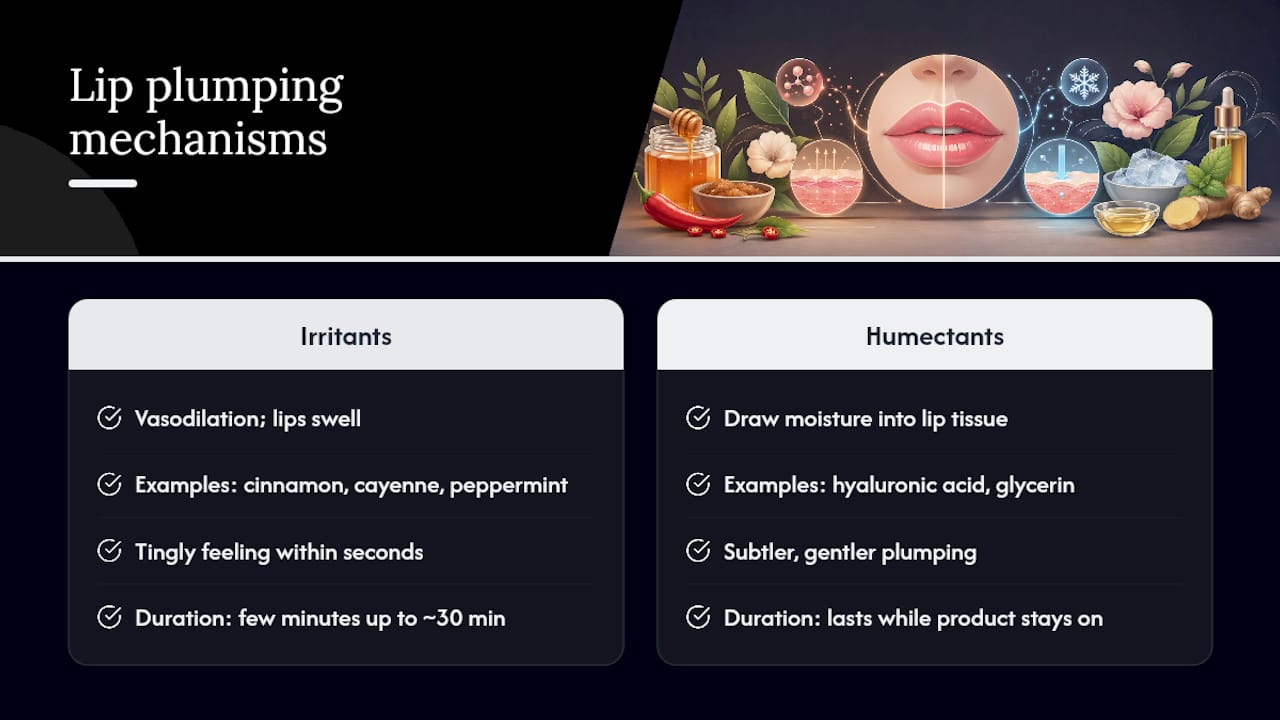
Mild irritants trigger local vasodilation. When cinnamon, cayenne, or peppermint contacts lip tissue, it causes a small, controlled inflammatory response. Blood rushes to the area, capillaries dilate, and the lips swell slightly. This is the same principle behind the tingly feeling you notice within seconds of application. According to Healthline, this effect is temporary, usually lasting a few minutes up to about 30 minutes.
Humectants draw water into the tissue. Hyaluronic acid and glycerin attract moisture from the environment and from deeper skin layers, plumping the lip surface from within. The effect is subtler than the irritant route but gentler, and it lasts as long as the product stays on.
Exfoliation amplifies both mechanisms. Removing the outer layer of dead skin cells with a sugar scrub lets active ingredients contact living tissue more directly, which is why the scrub-then-gloss combo in Recipe 5 tends to produce a more noticeable result than gloss alone. For a deeper look at how these natural lip plumping ingredients interact, Lumeracosmetica’s ingredient guide breaks down irritant versus hydrating actives in plain language.
How to prepare your lips and apply plumper for the best results
Sequence matters more than most people realize. Getting the order right takes five minutes and makes a visible difference.
- Exfoliate first. Use a gentle sugar scrub (Recipe 1 or 5) to remove dead skin. Do this 5–10 minutes before applying any plumper.
- Cleanse and dry. Rinse off the scrub, pat lips dry. Residual scrub particles can dilute your plumper.
- Patch-test any new recipe. If you haven’t used a recipe before, test it on your inner forearm the day before. This step is non-negotiable for cayenne and cinnamon recipes.
- Apply the plumper. Use a clean fingertip or a lip brush. For irritant-based recipes, a thin layer is enough. Leave on for the time specified in each recipe.
- Layer your humectant. After rinsing or wiping off an irritant-based plumper, apply a hyaluronic serum or balm while lips are still slightly damp. This locks in moisture and extends the smooth finish. Allure’s editors note that tingly plumping ingredients can dry lips if you skip this step.
- Finish with gloss or lipstick. Gloss adds optical volume on top of the physical plump. Apply within 5 minutes of the plumper for peak effect.
For a full step-by-step routine built around event-ready lips, Lumeracosmetica’s pout guide walks through the layering sequence in detail.
Pro Tip: Apply your plumper 10–12 minutes before photos or heading out. The initial tingle peaks around the 5-minute mark, and the visible fullness is at its best just after that window closes.
Safety rules, patch-test steps, and when to call a doctor
Most reactions to DIY plumpers are mild and short-lived. A few are not. Know the difference before you start.
Patch-test procedure
- Mix a small amount of your recipe (or just the active ingredient in its carrier oil).
- Apply a dime-sized amount to the inside of your forearm.
- Leave it on for 24 hours without washing.
- Check for redness, swelling, itching, or blistering.
- If any of those appear, do not use the recipe on your lips. If the area is clear, you’re good to proceed.
Healthline’s dermatology guidance specifically flags cinnamon oil and cayenne as capable of causing chemical burns or contact dermatitis in sensitive individuals. The inner-forearm test catches this before it reaches your face.
Ingredients to dilute or avoid
- Undiluted essential oils (peppermint, cinnamon leaf oil): always use in a carrier oil or gloss base at no more than 1–2% concentration
- Concentrated capsaicin extracts: use ground cayenne pepper only, not capsaicin isolates
- Unknown commercial additives: if a recipe calls for a product you can’t identify every ingredient in, skip it
Red-flag reactions: stop and seek care
If you experience severe burning that doesn’t subside within 5 minutes of rinsing, visible blistering, a rash spreading beyond the application area, or any difficulty breathing after using a lip plumper, stop use immediately, rinse thoroughly with cool water, and seek medical attention. These are signs of a significant allergic or chemical reaction, not normal plumping sensation.
For readers with sensitive skin, start with the hyaluronic balm (Recipe 4) — it contains no irritants at all. If you take medications that affect skin sensitivity or immune response, check with your clinician before using cayenne or cinnamon-based recipes. Lumeracosmetica’s safety guide covers contraindications in more detail.
How to store homemade plumpers and what they cost to make
Storage basics
- Use airtight containers: small glass jars or empty lip balm tins work well
- Oil-based balms (Recipes 2, 3, 4) stay stable at room temperature in a cool, dark spot
- Any recipe containing water-phase ingredients (honey, rose water, hyaluronic serum) should be refrigerated and used within 1 week
- Discard any batch that develops an off smell, changes color, or shows visible separation
Shelf life at a glance
Oil-only balms last 2–4 weeks. Scrubs with fresh ingredients (honey, rose water) last about 1 week refrigerated. The peppermint gloss, being petroleum or wax-based, holds up to 3–4 weeks at room temperature.
Cost per batch
A single batch of any recipe here uses pantry staples and costs roughly $1–$3 for a basic cinnamon or sugar scrub, up to $5–$8 if you’re buying jojoba oil or a hyaluronic serum for the first time. Once you have those base ingredients, subsequent batches drop to under $2. Time investment is 5–10 minutes per recipe. These are genuinely low-cost, low-effort fixes, which is the honest case for DIY over commercial alternatives.
What research and dermatologists say about DIY lip plumpers
The consensus is straightforward: DIY plumpers cause temporary swelling through blood-flow stimulation or surface hydration, not any structural change to lip tissue. There is no permanent effect, and no at-home recipe replaces clinical volume.
The albayrouni Pharmacy guide aligns with standard pharmacy practice: start with low concentrations of active spices or essential oils, always moisturize after use, and patch-test before every new formula. These aren’t optional steps. They’re what separates a pleasant tingle from a trip to urgent care.
Key insight: Pairing a plumping active with a humectant (hyaluronic acid) or emollient (jojoba, shea butter) isn’t just a comfort measure. It actively prevents the drying that irritant-based plumpers cause, which means your lips look better for longer after the initial effect fades.
For readers who want to go deeper on ingredient science, Lumeracosmetica’s natural lip plumper guide explains the mechanism behind each active ingredient category. If you want to add a hydrating boost to your routine beyond lip care, hyaluronic acid patches from SweeTee Beauty are a complementary option for the under-eye area.
One clear dermatologist-aligned recommendation: if you develop persistent redness, peeling, or irritation after repeated use of any plumping recipe, stop and consult a dermatologist before continuing. Repeated low-grade irritation can compromise the skin barrier over time.
The routine that actually holds up
The standard advice is to pick a recipe and apply it. What most guides skip is the order, and the order is what makes the difference between a noticeable result and a mildly tingly disappointment.
The routine worth repeating: exfoliate with a sugar scrub, rinse, apply a mild irritant-based plumper (cinnamon or peppermint), rinse after 2–3 minutes, then immediately layer a hyaluronic or jojoba balm while lips are still slightly warm. Finish with gloss. That sequence works because exfoliation opens the surface, the irritant drives blood flow, and the humectant locks in moisture before the skin can dry out.
For anyone with sensitive lips, skip the irritant step entirely and go straight from scrub to hyaluronic balm. The plumping effect is subtler, but there’s no risk of a reaction, and the lips look genuinely smooth and full rather than just reactive.
Lumeracosmetica’s ready-made alternative for consistent results
DIY recipes are satisfying to make and genuinely effective for occasional use. The limitation is consistency: a homemade batch varies batch to batch, has a short shelf life, and requires you to get the dilution right every time.
Lumeracosmetica’s Perfect Kiss Lipstick is formulated for readers who want the plumping and hydrating benefits without the kitchen chemistry. It combines gentle plumping actives with hydrating humectants in a tested, stable formula, available in multiple finishes. No patch-testing a new batch every week. No measuring cayenne at 7 AM. The color payoff is consistent, the wear is all-day, and the formula is designed to avoid the dryness that irritant-only DIY recipes can leave behind. For a deeper look at the gloss-finish options, Lumeracosmetica’s plumping gloss guide covers what to expect from each formula. Browse the full collection at Lumeracosmetica and find the finish that fits your routine.
Sources
- 11 ways to plump your lips | Healthline
- Best lip plumpers | Allure
- DIY Lip Plumper: Fuller Lips Naturally at Home – albayrouni Pharmacy
- Want fuller lips like Priyanka Chopra? Try her DIY lip scrub | Asianet Newsable


