

How to Apply Lip Liner for Fuller, Plumper Lips

Overline just a small amount beyond your natural border on the top lip and along the center of the bottom lip, fill the entire lip with liner, then blend inward with a lipstick or gloss and add a lighter shade to the center. That three-step sequence, done in under five minutes, is the fastest reliable way to make lips look fuller with liner.
- Line: trace just outside your natural border, top and center-bottom only
- Fill: color in the whole lip with liner for a long-wearing base
- Blend and highlight: pull lipstick inward over the liner, dab a lighter gloss at the center
Pro Tip: Never overline the outer corners. Extending the line past the corners is the single most obvious tell that you’ve drawn on a larger lip shape. Keep the extra width concentrated at the center arch and center bottom, and the effect reads as natural fullness rather than a drawn-on outline.
Key Takeaways
Subtle overlining of roughly 1 mm at the center arch and center bottom, combined with a full liner fill and a lighter center shade, produces believable, camera-ready fullness without a drawn-on look.
| Point | Details |
|---|---|
| Overline subtly | Stay within ~1 mm of the natural border; never extend past the outer corners. |
| Prep the base | Exfoliate, apply balm, blot, and optionally prime before lining for better precision and wear. |
| Fill, then blend | Fill the entire lip with liner first, then pull lipstick inward to eliminate visible seams. |
| Use shade for depth | A slightly warmer or deeper liner at the border adds dimension the way contouring adds cheekbone definition. |
| Lumeracosmetica kit | The brand’s liner, center-highlight gloss, and blending brush cover every step of both the natural and glam routines. |
Table of Contents
- How to prepare your lips so liner lays smoothly and lasts
- How to apply lip liner for fuller lips: step-by-step
- Which liner shades and formats work best for your look
- Advanced tweaks by common lip shapes
- How to blend liner into lipstick and finish for a camera-ready result
- Common lip-lining mistakes and quick fixes
- Two timed routines: natural and glam
- What makeup artists actually say about creating fuller lips
- How to keep your lip liner looking fresh all day
- When fuller lips are and aren’t the right choice
- Lumeracosmetica’s lip liner kit makes the technique easier
- Sources
How to prepare your lips so liner lays smoothly and lasts
Liner on dry, flaky lips feathers, skips, and fades fast. A two-minute prep routine fixes all three problems before you uncap the pencil.
- Exfoliate gently. A damp washcloth or a sugar scrub removes dead skin so the liner glides instead of catching on rough patches.
- Apply a light balm. A thin layer of balm or a hydrating lip mask plumps the surface and prevents tugging. Let it sit for 60–90 seconds, then blot off the excess with a tissue. Skipping the blot leaves a slippery film that makes liner slide.
- Optional: apply a lip primer or thin layer of concealer. A lip primer extends wear noticeably. A dab of concealer over the lip border mutes your natural pigment, which lets a nude or pink liner read true and makes subtle overlining less detectable.
- Sharpen or warm your liner. A freshly sharpened pencil gives a clean edge. If you use a creamy or auto-advance liner, warm the tip for a few seconds against the back of your hand before tracing. Cold, stiff tips drag and deposit unevenly.
According to Glamour’s pro makeup artist guidance, short light strokes on a prepped lip produce the most precise line and the best wear.
How to apply lip liner for fuller lips: step-by-step
- Start at the Cupid’s bow. Place the pencil at one peak of the Cupid’s bow and draw a small X shape across the bow. This anchors the shape symmetrically before you trace outward.
- Trace the top lip with short strokes. Work from the bow toward each corner using short, feathery strokes rather than one long drag. Stay just slightly outside your natural border at the arch; taper back to your natural line as you approach the corners. Who What Wear’s liner guide specifically advises against overextending past the lip corners.
- Trace the bottom lip. Overline only the center part of the bottom lip by a small amount. The corners of the bottom lip stay on or just inside the natural line.
- Fill the entire lip. Color in both lips completely with the liner. Filling with liner before lipstick creates a long-wearing base, prevents feathering, and evens out color when you blend the lipstick over it.
- Apply lipstick and pull it inward. Press lipstick from the center outward so it blends into the liner edge rather than stopping at it. The goal is a gradient, not a hard seam.
- Add a lighter center highlight. Dab a sheer gloss or a lighter lipstick shade on the center of both lips. This creates the illusion of projection and 3D volume.
- Check in two lights. Look in a mirror at arm’s length under natural light, then take a quick phone selfie. Selfie cameras compress and distort, so if the line looks believable on camera, it will look even more natural in person.
Pro Tip: Rest your elbow on a flat surface while lining. The steadier your hand, the less pressure you apply, and lighter pressure produces a softer, more blendable line. A heavy hand creates a waxy ridge that’s hard to diffuse.
Which liner shades and formats work best for your look
Shade selection is where most people leave volume on the table. A liner that matches your lipstick exactly creates a flat, outlined look. A shade that is slightly deeper or warmer than your lipstick acts like contouring for the lips, sculpting edges and adding believable depth rather than just defining them. For bare or gloss looks, a shade close to your natural lip tone keeps the overline invisible.
- Nude/natural tone: best for subtle everyday overlining; the extra 1 mm reads as your actual lip edge
- Slightly deeper or warmer shade: adds shadow and dimension; pairs well with warm nudes, berries, and mauves
- Matching shade: works for bold, opaque lipstick colors where the liner is purely a base and feathering barrier
Format guidance:
- Traditional wax pencil: sharpens to a fine point, gives the most control for precise edges; best for beginners and for anyone who wants a clean, defined border
- Creamy or auto-advance liner: softer formula blends easily with a fingertip; slightly less precise but faster to diffuse; good for soft, blurred looks
- Felt-tip or pen-style liner: deposits a thin, natural-looking line with minimal pressure; ideal when you want a barely-there definition rather than a sculpted edge
Pro Tip: Major U.S. drugstore and prestige brands carry liners in all three formats. Rare Beauty Kind Words Lip Liner, Jones Road The Lip Pencil, and Half Magic’s Sculptitude pencils are all well-regarded options in the creamy-to-pencil range. ColourPop Blotted Lip and Prada Beauty Monochrome Soft Matte Lipstick can double as a lip base when you want a softer, blurred finish rather than a hard-lined edge.
Advanced tweaks by common lip shapes
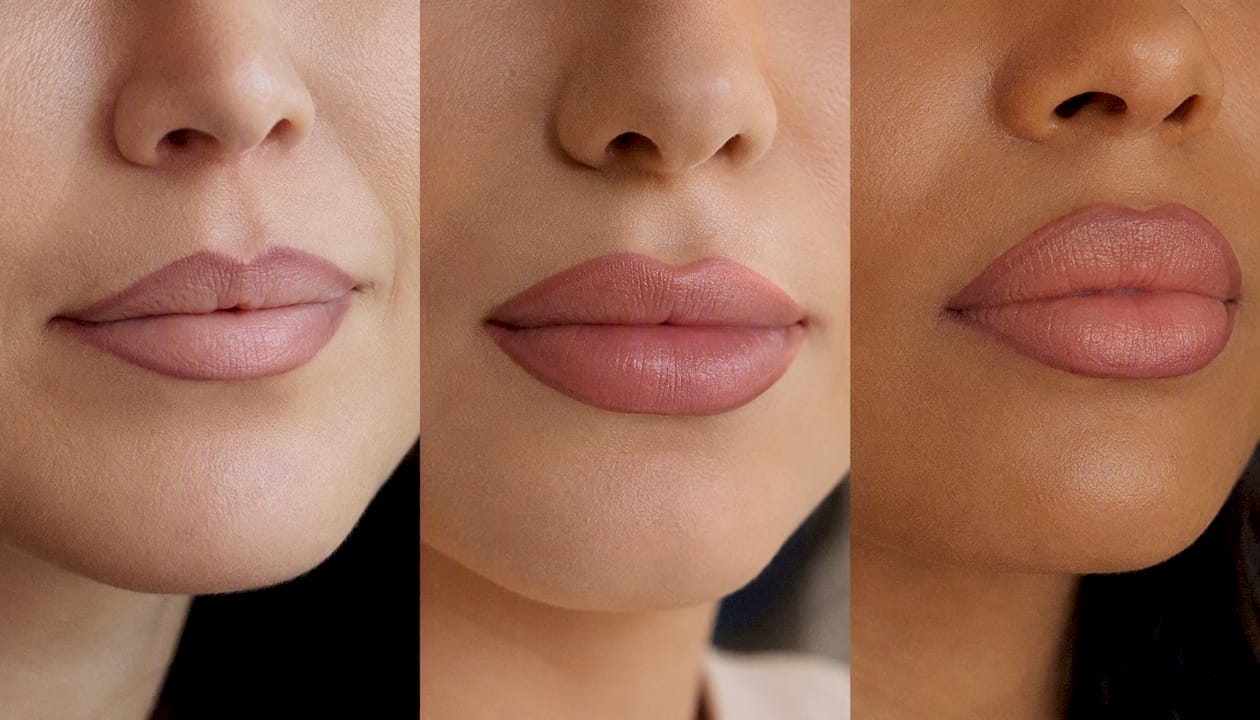
Not every lip needs the same adjustment. Identify your shape first, then apply only the relevant tweak.
Thin top lip:
- Overline the entire top arch by 1 mm, including slightly past the peaks of the Cupid’s bow
- Soften the Cupid’s bow peaks with a fingertip to round them; sharp peaks emphasize thinness rather than volume
- Before/after: the top lip reads as balanced with the bottom rather than receding behind it
Flat bottom lip:
- Concentrate the overline on the center third of the bottom lip only
- Add a small shadow beneath the center of the bottom lip using a slightly deeper liner or matte bronzer; this shadow increases perceived projection and makes the lip appear to push forward
- Before/after: the bottom lip gains a rounded, pillowy quality instead of reading as a flat line
Uneven corners or asymmetry:
- Trace the lower corner on the smaller side very slightly outside the natural line; keep the dominant side on the natural border
- Check in the mirror with your face relaxed, not smiling, before blending
- Before/after: the two sides read as level rather than one corner appearing to droop
Pronounced Cupid’s bow:
- Soften the peaks by tracing a slightly rounded line across the bow rather than following the sharp V
- Fill in the dip of the bow with liner to reduce the depth of the V
- Before/after: the top lip looks fuller and more symmetrical rather than heart-shaped
For more targeted guidance on contouring with lip liners, including placement for mature lips, Lumeracosmetica’s blog covers shape-specific techniques in detail.
How to blend liner into lipstick and finish for a camera-ready result
- Soften the edge first. Before applying any lipstick, press a fingertip or a small lip brush along the outer edge of the liner. This diffuses the hard border so there’s no visible seam between liner and bare skin.
- Apply lipstick from the center outward. Press the bullet or a brush from the center of each lip toward the corners, pulling the color into the liner rather than stopping at it. The liner and lipstick should look like one continuous color.
- Add the lighter center shade. A dab of a sheer gloss, a lighter lipstick, or even a touch of highlighter on the center of the top and bottom lip creates the 3D volume effect. Keep it small, roughly the size of a pea.
- Clean up edges with concealer. Dip a small brush or a cotton swab into a concealer one shade lighter than your foundation and trace just outside the lip line. This sharpens the border and makes the overline look intentional rather than smudged.
- Optional: set with translucent powder. For a matte finish that lasts, press a tiny amount of translucent powder over the lips with a sponge. Skip this step if you’re wearing gloss.
- Add a Cupid’s bow highlight. A tiny dot of a shimmery highlighter or a light eyeshadow pressed onto the center of the Cupid’s bow catches light and adds the final dimension.
Pro Tip: For photos, check your lip look under a direct overhead light before shooting. Overhead light creates shadows that can make a subtle overline look heavier on camera. If it looks slightly too defined under direct light, it will photograph perfectly.
Common lip-lining mistakes and quick fixes
- Overlining the corners. The corners anchor the perceived width of your mouth. Extending the line there makes the whole shape look drawn-on. Fix: use a concealer brush to trim the outer corners back to the natural line.
- Too much contrast between liner and lipstick. A dark liner under a pale lipstick creates a ring effect. Fix: blend the liner edge thoroughly, or switch to a liner that’s only one shade deeper than your lipstick.
- Hard, unblended edges. A visible ridge of liner around the lip reads as costume makeup. Fix: press a damp beauty sponge along the outer edge to soften it, then reapply lipstick over the top.
- Uneven lines from one side to the other. One peak higher than the other, or one corner lower. Fix: use a cotton swab dipped in micellar water to erase the lower side, then redraw it.
- The mirror-distance test. Hold your mirror at arm’s length. If you can clearly see the liner line as a separate element from your lip color, it needs more blending. On a phone selfie, the same rule applies: the liner should read as a lip edge, not a drawn outline.
Two timed routines: natural and glam
Natural everyday look (2–4 minutes)
- Blot lips, apply thin balm, wait 60 seconds, blot again (1 min)
- Sharpen or warm liner tip (15 sec)
- Trace top arch and center-bottom with short strokes, 1 mm overline (45 sec)
- Fill lips lightly with liner (30 sec)
- Apply sheer lipstick or tinted balm, blend inward (30 sec)
- Dab clear gloss at center (15 sec)
Touch-up: carry the liner and gloss. Reapply gloss every 2 hours; re-trace the arch if the line fades.
Nighttime glam look (5–8 minutes)
- Full prep: exfoliate, balm, blot, concealer on border (2 min)
- Sharpen liner; trace top arch with deeper/warmer shade, 1 mm overline (1 min)
- Trace bottom center, add subtle shadow beneath with a slightly deeper liner (1 min)
- Fill entire lip with liner (30 sec)
- Apply opaque lipstick, blend edges precisely with a lip brush (1 min)
- Add lighter center shade, Cupid’s bow highlight, concealer cleanup (1 min)
- Camera check under direct light (30 sec)
Touch-up: blot with a tissue, press a thin layer of translucent powder, reapply lipstick center only. Avoid re-tracing the liner over lipstick; it smears.
What makeup artists actually say about creating fuller lips
The most useful framing from working makeup artists is this: you’re not drawing a bigger lip, you’re creating a small shadow that tricks the eye into seeing more projection.
That framing changes how you apply the liner. Instead of tracing a bigger shape, you’re placing a slightly darker edge that creates the illusion of a raised, rounded lip. The lip contouring approach of using a slightly deeper or warmer liner rather than matching it exactly to the lipstick is the single most underused technique for adding believable dimension.
Pro Tip: For a first attempt, Lumeracosmetica recommends starting with a creamy pencil liner in a shade one step warmer than your natural lip tone. It blends forgivingly, holds well, and works in both the 2-minute natural routine and the full glam look.
For a deeper look at overlining step by step, Lumeracosmetica’s blog walks through the technique with additional visual guidance.
How to keep your lip liner looking fresh all day
Liner fades in a predictable pattern: the center goes first, then the fill, and the border outline is usually the last thing standing. Knowing that sequence tells you exactly how to maintain the look.
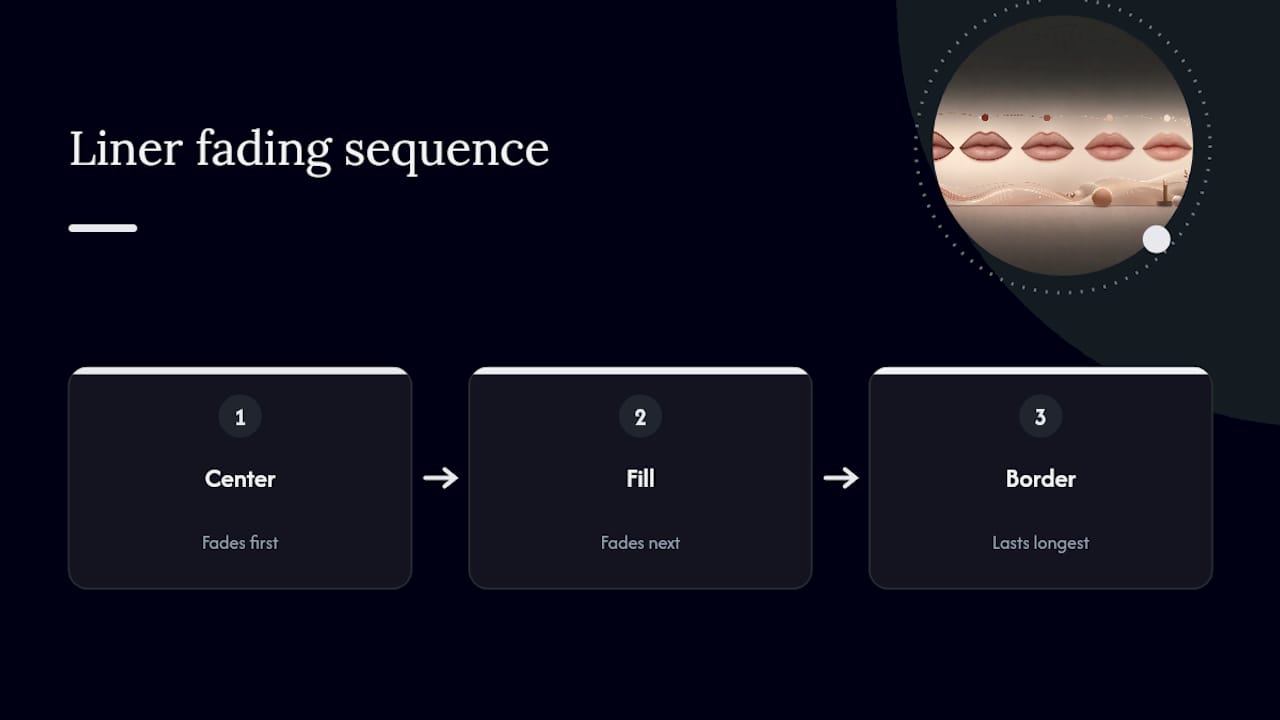
Layering for longevity. Filling the entire lip with liner before applying lipstick is the single most effective longevity technique. The liner acts as a pigmented primer that keeps color anchored even after the lipstick wears off the center.
Touch-up method. Blot the lips with a single-ply tissue to remove oils and food residue. Press a thin layer of translucent powder over the lips with a sponge. Reapply lipstick to the center only, pressing rather than swiping. Avoid re-tracing the liner border over lipstick; the liner tip picks up lipstick and smears the line.
Drinking and eating. Sip through a straw when possible. After eating, blot rather than wipe. A full re-application takes about 90 seconds if you’ve kept the liner and lipstick in your bag.
Long-wear formulas. Wax-based pencil liners generally outlast creamy formulas. For all-day events, a waterproof pencil liner under a long-wear liquid lipstick holds the border for 6–8 hours without touch-ups.
When fuller lips are and aren’t the right choice
Fuller lips via liner work best when the goal is subtle. A 1 mm overline reads as your natural lip in person and on most cameras. Push it to 2 mm or beyond and the effect shifts from “naturally full” to “visibly drawn,” especially in direct light or close-up photos.
Phone selfie cameras use a wide-angle lens that distorts facial proportions, making lips appear larger than they are in real life. If your liner looks barely noticeable on a selfie, it will look completely natural in person. Use that as your calibration point rather than a mirror at close range.
Daily liner use is fine for most people. If you notice dryness or irritation at the lip border, scale back to a lighter formula or skip the concealer base step. The techniques here are low-commitment: a creamy liner and a gloss take 90 seconds to apply and 10 seconds to remove.
Lumeracosmetica’s lip liner kit makes the technique easier
The techniques in this guide work best when the tools are matched to the method. Lumeracosmetica’s lip enhancement kit is built around exactly that: a creamy precision liner, a complementary lip gloss with a lighter center shade, and a blending brush sized for the lip border.

- Creamy precision liner: warm, blendable formula for the 2-minute natural routine and the full glam look
- Center-highlight gloss: sheer, lighter shade that creates the 3D volume effect in step 6
- Lip blending brush: small enough to diffuse the liner edge and clean up corners without disturbing the lipstick
The kit covers every step from trace to finish. Visit Lumeracosmetica to see the full range and find the shade that fits your natural lip tone.
Sources
- How to Make Your Lips Appear Fuller With Lip Liner
- How to Apply Lip Liner Correctly, According to Pro Makeup Artists | Glamour
- How to Apply Lip Liner | Who What Wear
- How to contour your lips (Who What Wear)
- How to Apply Lip Liner - wikiHow
Recommended
- Make Lips Look Fuller Step by Step: Achieve a Plumper Pout – Luméra Cosmetica
- How to Line Lips to Look Fuller Naturally Step by Step – Luméra Cosmetica
- How to Make Lips Look Bigger With Lip Liner Naturally – Luméra Cosmetica
- How to Make Lips Look Fuller Naturally: A Step-by-Step Guide – Luméra Cosmetica


