

Creating a bold, statement lip can feel intimidating, especially as your lips change over time. Many women over 40 struggle with achieving smooth, vibrant lip color that lasts without settling into fine lines or feathering. This comprehensive tutorial will walk you through every step needed to master stunning statement lips, from prepping your canvas to applying color like a professional makeup artist. You’ll learn essential techniques, discover the right tools, and avoid common pitfalls that prevent flawless results. By the end, you’ll have the confidence to rock any bold lip shade beautifully.
Table of Contents
- Key takeaways
- Preparing your lips for statement lip color
- Step-by-step application for flawless statement lips
- Fixing common issues and ensuring all-day lip wear
- Discover quality lip products at Luméra Cosmetica
- Frequently asked questions
Key Takeaways
| Point | Details |
|---|---|
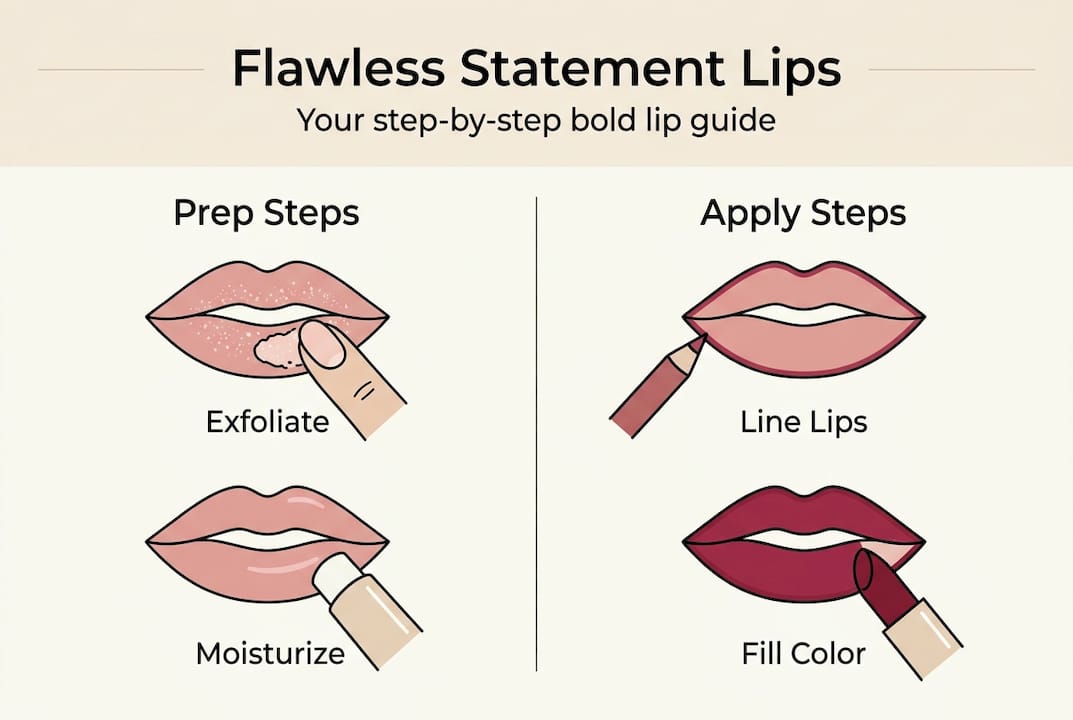
| Proper lip prep | Exfoliate to remove dead skin, then moisturize and let balm absorb for a smooth base that improves wear. |
| Use lip liner | A lip liner shapes the lips and prevents feathering for a polished, long lasting look. |
| Layer and blot | Apply lipstick in layers and blot between applications to boost color payoff and longevity. |
| Choose flattering colors | For mature skin, pick shades that complement undertones such as rich reds, warm berries, and mauves. |
Preparing your lips for statement lip color
Before you even think about reaching for that gorgeous red or berry lipstick, your lips need proper preparation. Prepping lips thoroughly is essential for achieving professional results that last. Start by gently exfoliating your lips to remove any dead skin cells that could create a bumpy, uneven surface. You can use a soft toothbrush with a tiny amount of lip balm or a dedicated lip scrub.
After exfoliating, apply a nourishing lip balm and let it absorb completely for about 10 minutes. This hydration step plumps your lips slightly and creates a smooth base that prevents lipstick from clinging to dry patches. While your balm is absorbing, gather all the tools you’ll need for flawless application.
Your essential toolkit should include:
- A lip liner that matches your lipstick or is one shade darker
- Your chosen lipstick in a bold, statement shade
- A precision lip brush for controlled application
- Tissues for blotting between layers
- A small concealer brush and your regular concealer
- Translucent powder for setting
Selecting the right lip color makes a dramatic difference in how flattering your statement lip appears. For mature skin, you’ll want to choose shades that complement your undertone rather than fighting against it. Explore guidance on picking good lip colors that enhance your natural coloring. Rich reds, warm berries, and sophisticated mauves typically work beautifully for women over 40.
| Preparation step | Product needed | Time required |
|---|---|---|
| Exfoliation | Lip scrub or soft toothbrush | 30 seconds |
| Hydration | Nourishing lip balm | 10 minutes |
| Tool gathering | Liner, lipstick, brush, concealer | 2 minutes |
| Color selection | Flattering shade for skin tone | Variable |
Pro Tip: Blot away excess lip balm with a tissue before applying liner or lipstick. Too much moisture on your lips will prevent color from adhering properly and reduce wear time significantly.
Taking these preparation steps seriously transforms your entire statement lip experience. You’ll notice smoother application, more vibrant color payoff, and significantly longer wear throughout your day. Think of lip prep like priming a wall before painting it. The better your foundation, the more stunning your final result.
Step-by-step application for flawless statement lips
Now that your lips are perfectly prepped, it’s time to apply your statement color with precision and confidence. Following the correct sequence ensures your bold lip looks intentional and polished rather than messy or overdone. Using lip liner shapes and enhances your lips for a professional finish.
Follow this exact application sequence:
- Start by lining your lips with your chosen lip liner, beginning at the cupid’s bow and working outward to the corners.
- Continue the liner along your bottom lip, creating a smooth, even outline that defines your natural lip shape.
- Fill in your entire lip area with the liner, creating a base that prevents feathering and extends lipstick wear.
- Use your lip brush to apply lipstick over the liner, starting from the center and working outward for even coverage.
- Blot your lips gently with a tissue to remove excess product and set the first layer.
- Apply a second layer of lipstick for deeper color intensity and better longevity.
- Clean up edges with concealer on a small brush for sharp, defined lines that make your lips pop.
- Optional: Lightly dust translucent powder around the outer edges of your lips to lock everything in place.
The way you shape your lip liner can subtly alter how your lips appear. Understanding these effects helps you enhance your natural features without looking overdone or unnatural.
| Liner technique | Visual effect | Best for |
|---|---|---|
| Following natural line exactly | Clean, polished look | Balanced lip proportions |
| Slightly overlining top lip | Fuller upper lip appearance | Thin upper lips |
| Emphasizing cupid’s bow | Defined, youthful shape | Softened lip contours |
| Rounding bottom corners | Lifted, happier expression | Downturned mouth corners |
Blending your liner seamlessly with your lipstick creates a natural yet bold effect that doesn’t look harsh or dated. After filling in your lips with liner, use your lip brush to softly blend the edges before applying lipstick. This technique prevents the obvious liner outline that can age your look.
Pro Tip: When cleaning up edges with concealer, use a shade that matches your foundation exactly. Apply it with a small, precise brush and blend outward away from your lips. This creates a crisp edge while making your statement lip the clear focal point of your face.
For mature lips, avoid extreme overlining that extends more than 1 millimeter beyond your natural lip line. Instead, focus on enhancing what you have by defining your natural shape beautifully. Check out detailed lipstick application steps and good lip color tips for additional guidance on creating your perfect statement lip.
The key to masterful application is patience and precision. Rushing through these steps results in uneven color, blurred edges, and shorter wear time. Take your time, work in good lighting, and use a magnifying mirror if needed to see every detail clearly.
Fixing common issues and ensuring all-day lip wear
Even with perfect application, statement lips can present challenges throughout the day. Knowing how to troubleshoot common problems and maintain your look keeps you confident from morning to evening. Understanding what causes issues helps you prevent them before they start.
The most frequent problems women encounter include:
- Feathering or bleeding of color into fine lines around the lips
- Fading or disappearing color, especially after eating or drinking
- Dryness that makes lips feel tight and uncomfortable
- Uneven texture where lipstick settles into lip lines
- Transfer onto cups, utensils, or other people
Feathering happens when lipstick migrates into the tiny lines around your mouth. Combat this by always using lip liner as a barrier and applying concealer or foundation around your lip line before color application. The powder you dusted around your lips earlier also helps prevent this migration.
Techniques and product recommendations make bold lip color stay vibrant throughout your day. After your first layer of lipstick, press a single tissue against your lips and dust a tiny amount of translucent powder over it. This sets your color without dulling the finish. Remove the tissue and apply your second lipstick layer for a locked-in effect that resists smudging.
For maximum longevity, carry essential touch-up items in your bag. You’ll need your lipstick, a small lip brush for precise reapplication, and tissues for blotting. A clear lip gloss can refresh your look when color starts to fade, adding dimension without requiring complete reapplication. Apply gloss to the center of your lips only for a modern, fuller appearance.
Pro Tip: Apply a thin layer of long-lasting lip stain underneath your lipstick for insurance against fading. Even when your lipstick wears away slightly, the stain underneath maintains color on your lips. Learn more about long-lasting lip stain tips for extended wear.
Expert makeup artists caution against excessive layering, which can cause lipstick to crack and flake. Stick to two layers maximum, with proper blotting between each application. More layers don’t equal better wear, they just create texture problems.
If you notice dryness developing, resist the urge to lick your lips, which only makes the problem worse. Instead, apply a thin layer of clear balm over your lipstick to add moisture without disturbing the color. Choose a non-glossy balm that won’t break down your lipstick formula.
When eating, take small bites and blot your lips with a napkin afterward rather than rubbing. Rubbing removes color unevenly, while gentle blotting maintains your look. After meals, check your lips in a mirror and touch up the inner portions if needed, which typically fade first.
Maintaining statement lips requires minimal effort once you understand these strategies. With the right techniques and a small touch-up kit, your bold lip can look freshly applied from breakfast through dinner. The confidence you’ll feel wearing a perfectly maintained statement lip makes every bit of effort worthwhile.
Discover quality lip products at Luméra Cosmetica
Creating stunning statement lips becomes easier when you have access to premium products designed specifically for mature skin. Luméra Cosmetica offers carefully curated lipsticks, liners, and lip care essentials that complement the techniques you’ve just learned. Their formulas are developed with mature lips in mind, providing rich color payoff without settling into fine lines or causing dryness.
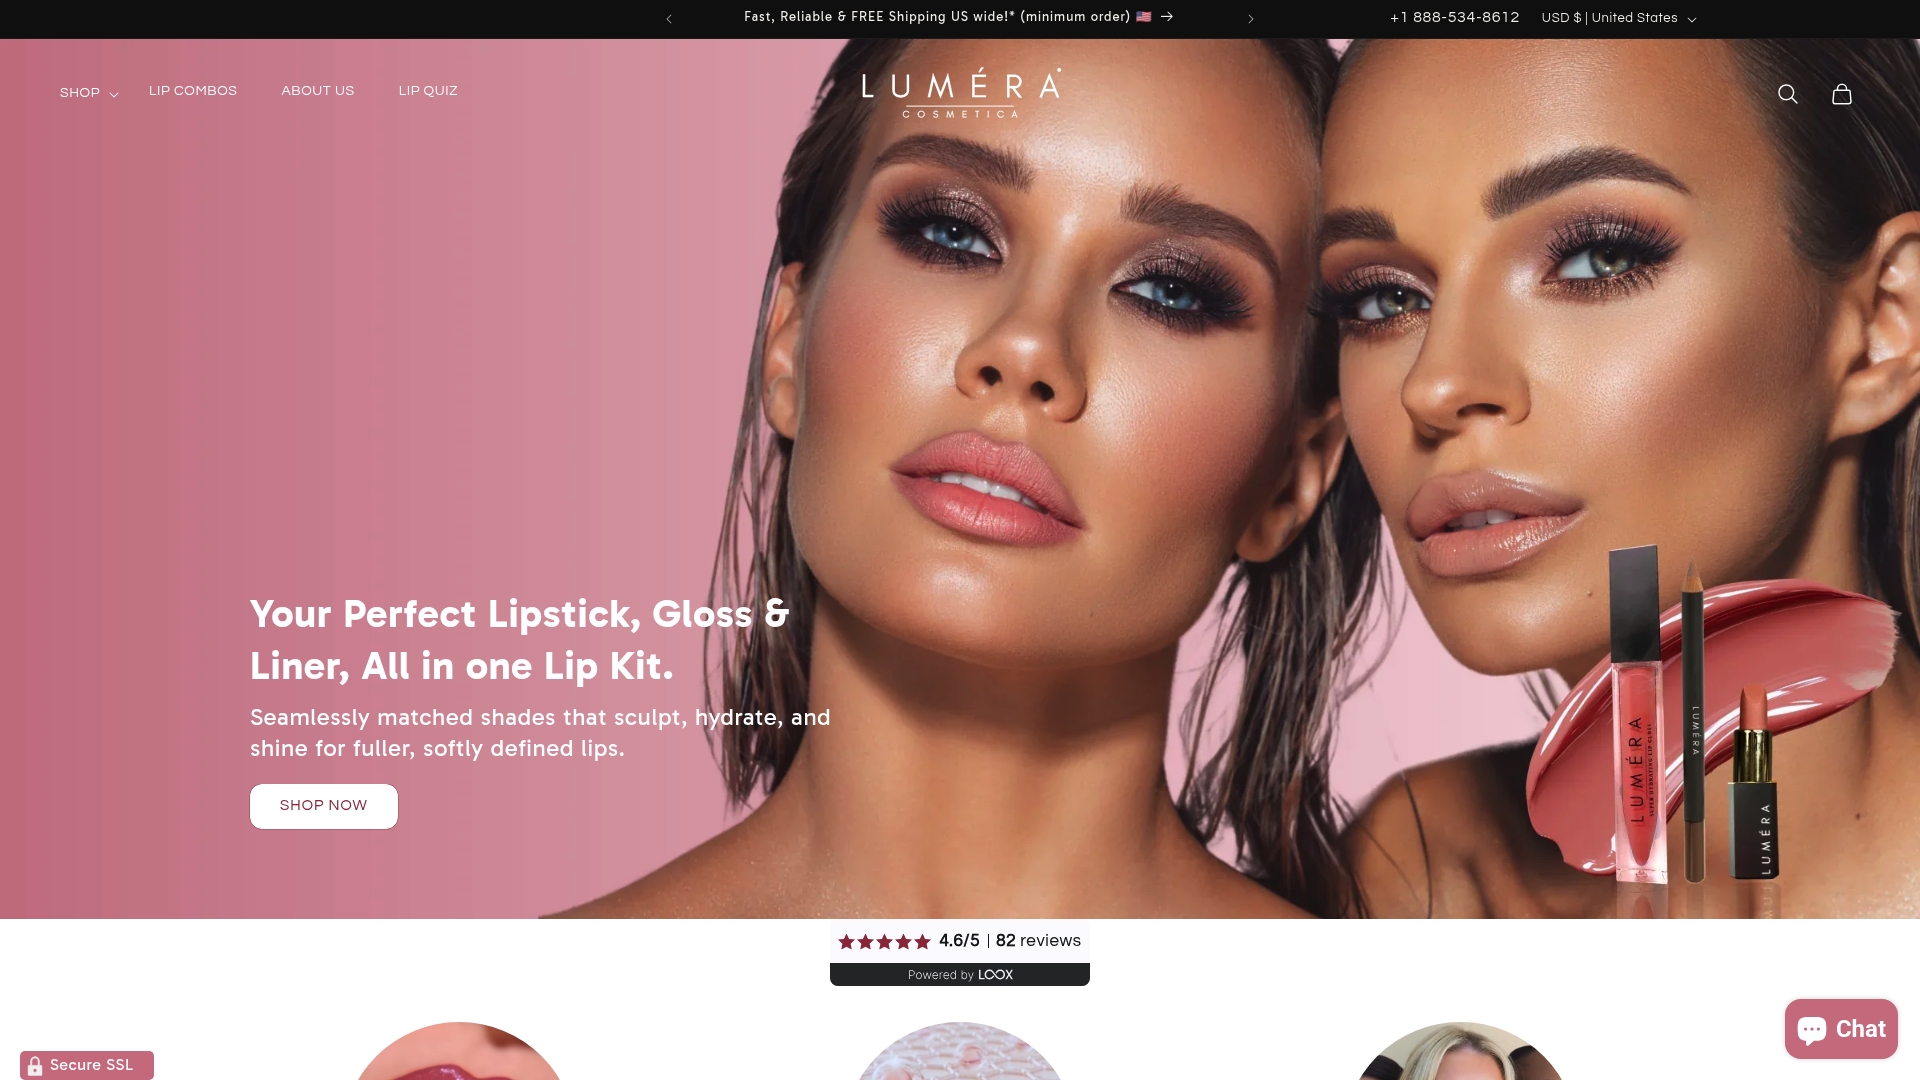
Explore expert-recommended shades that flatter women over 40, from sophisticated berries to timeless reds and elegant mauves. Each product is formulated to enhance lip texture and provide the longevity you need for all-day confidence. Whether you’re searching for your signature statement shade or expanding your lip color collection, you’ll find options that make application easier and results more beautiful. Visit the Luméra Cosmetica homepage to discover the full range of tailored beauty essentials that support your most stunning lip looks.
Frequently asked questions
How do I choose the best lip color for mature lips?
Opt for moisturizing formulas in shades that complement your skin undertone, avoiding overly bright neons or dull, lifeless hues. Rich reds, berry tones, and warm pinks create flattering effects that enhance rather than overpower your natural coloring. Consult detailed guides on choosing lip color for mature lips to find your most flattering shades based on undertone and personal style preferences.
What is the best way to make lipstick last longer on the lips?
Prep lips thoroughly with exfoliation and balm, then use lip liner to fill in your entire lip area before applying lipstick. Apply lipstick in thin layers with tissue blotting between each application, and set with a light dusting of translucent powder. A lip stain base underneath your lipstick can dramatically enhance duration without causing dryness or discomfort. Learn comprehensive strategies in this long-lasting lipstick method guide.
Can I safely change lip shapes with liner on mature lips?
Yes, subtle overlining can enhance your lip shape beautifully when done correctly and blended well with your lipstick. Limit overlining to 1 millimeter maximum beyond your natural lip line to maintain a natural, age-appropriate appearance. Focus on defining and enhancing your existing shape rather than creating dramatically different proportions. Discover techniques for using lip liner naturally to subtly improve lip fullness and definition.
Should I use matte or glossy lipstick for statement lips over 40?
Both finishes can work beautifully depending on your lip condition and personal preference. Matte formulas offer superior longevity and bold impact but can emphasize dryness or fine lines if your lips aren’t properly hydrated. Glossy or satin finishes provide moisture and create a plumping effect that minimizes texture concerns. Many women find a hybrid approach works best by applying matte color, then adding a touch of gloss to the center of lips for dimension without sacrificing wear time.
How often should I reapply statement lipstick throughout the day?
With proper application techniques including liner, layering, and setting, you should only need to touch up after meals or every 4 to 6 hours. Check your lips in natural lighting periodically to catch any fading before it becomes obvious. Keep your touch-up quick by focusing on the inner portions of your lips where color fades first, then blending outward. Carrying your exact lipstick shade and a small lip brush makes reapplication fast and precise wherever you are.