

Flaky lips can make even the glossiest lip products look uneven or dull. For women in Australia, the UK, and across Europe, preparing your lips with gentle exfoliation and hydration sets the stage for a truly polished finish. Focusing on lip preparation as the essential foundation helps your gloss glide on smoothly and last longer. Discover practical steps that create a comfortable, luminous look whether you’re attending a special event or elevating your everyday style.
Table of Contents
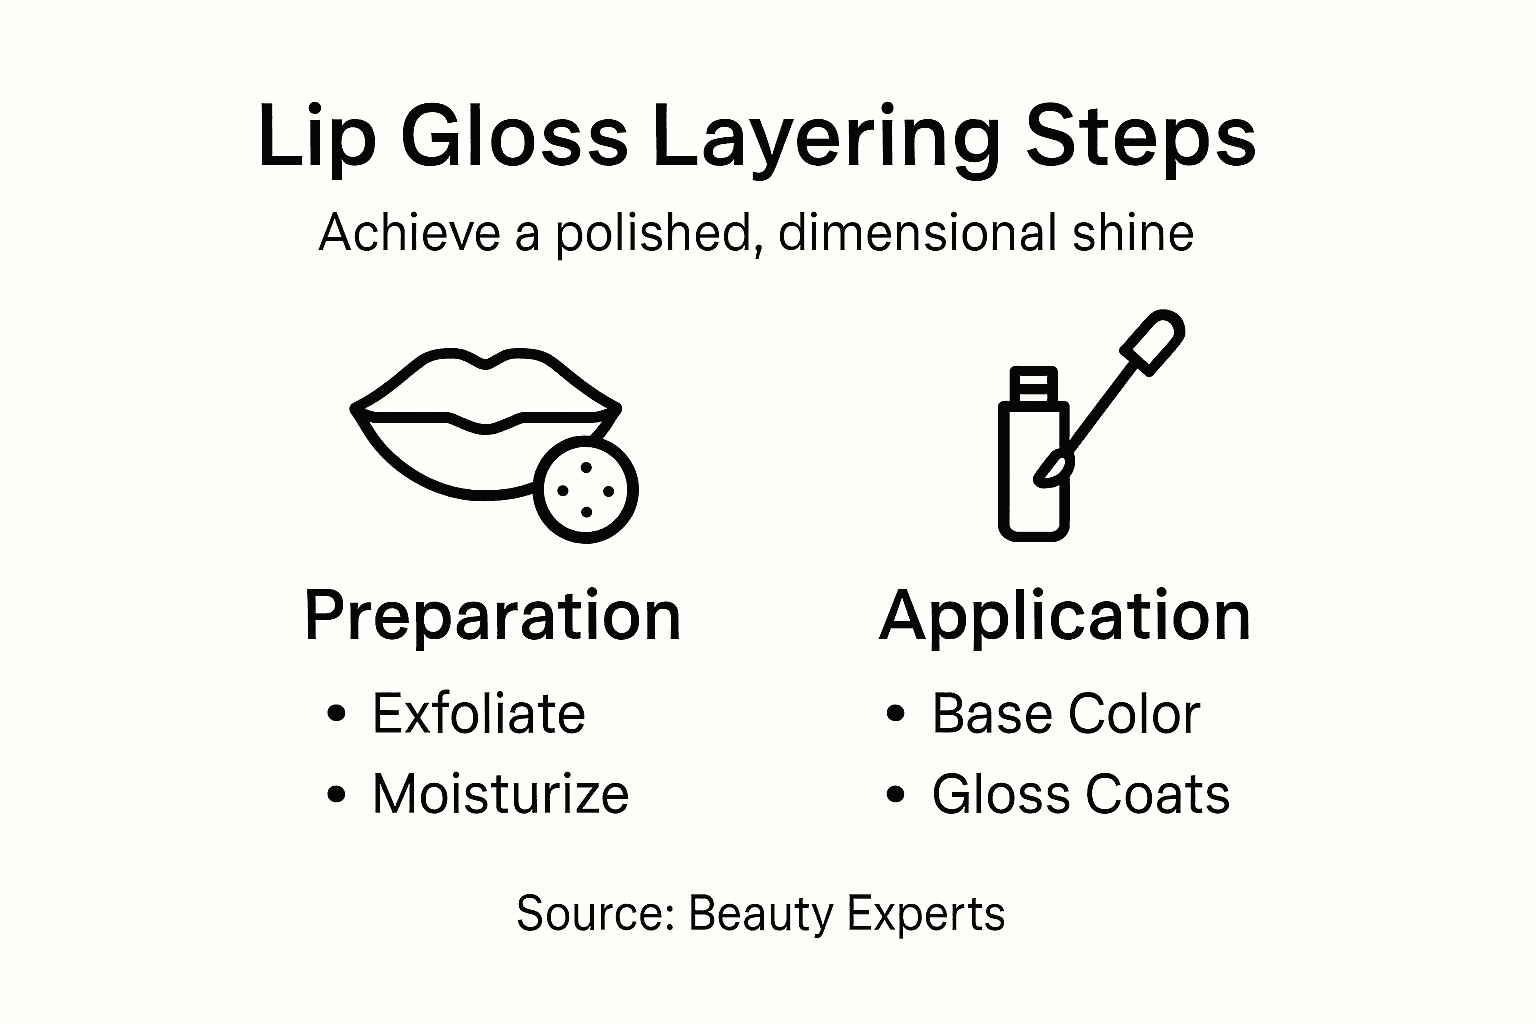
- Step 1: Prepare and Exfoliate Lips
- Step 2: Apply Lip Liner for Definition
- Step 3: Layer Base Lip Color Evenly
- Step 4: Add Multiple Gloss Coats Strategically
- Step 5: Check and Refine Gloss Finish
Quick Summary
| Key Insight | Explanation |
|---|---|
| 1. Exfoliate Lips Gently | Use a sugar and oil scrub in circular motions to remove dead skin and create a smooth lip surface. |
| 2. Define with Lip Liner | Apply lip liner closely matching your lip color to enhance shape and prevent color bleeding. |
| 3. Layer Lip Color Evenly | Use light strokes to apply creamy lipstick from the center outwards to ensure even pigmentation. |
| 4. Apply Gloss Strategically | Start with a thin gloss coat in the center and build up for dimension without overwhelming the base color. |
| 5. Check and Refine Gloss Finish | Assess your lips in natural light to smooth any uneven areas and achieve a polished look. |
Step 1: Prepare and Exfoliate Lips
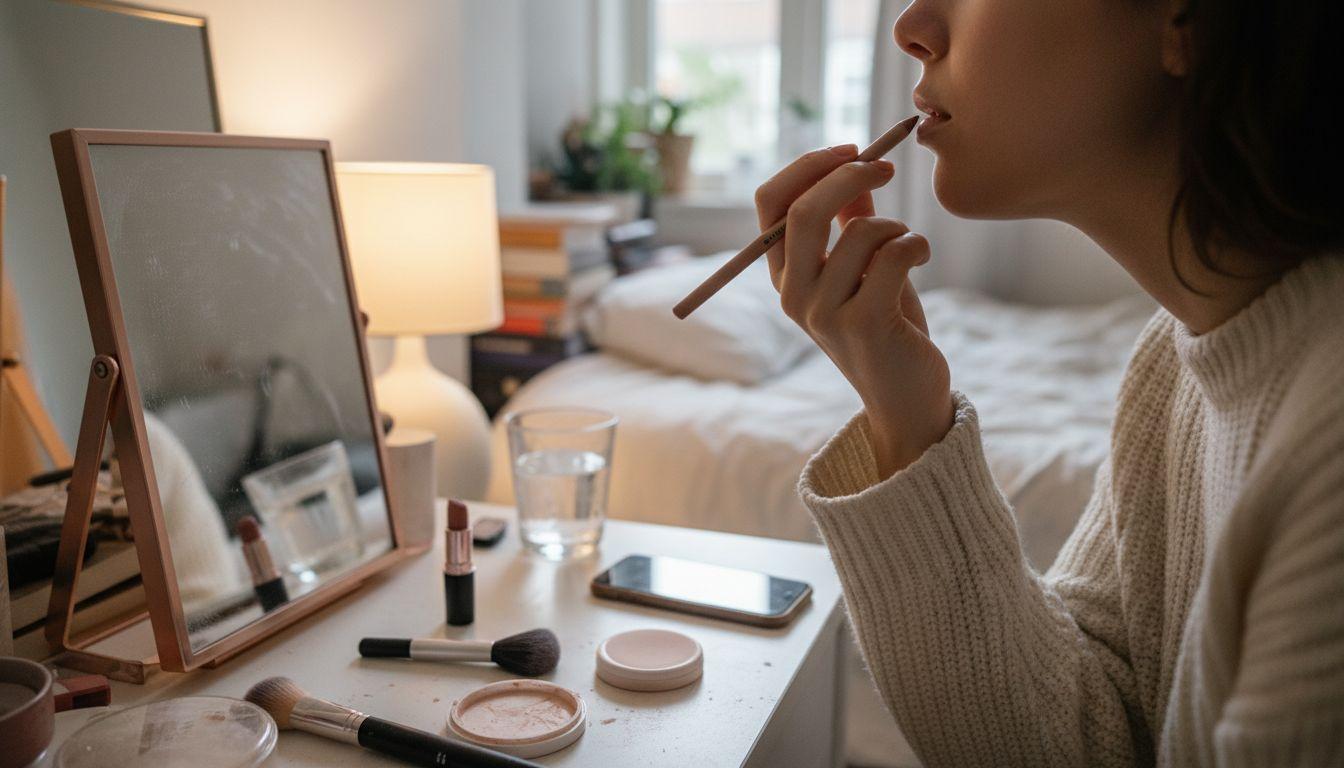
Lip preparation is the essential foundation for achieving a flawless, long-lasting lip gloss application. Before diving into layering techniques, you need to create a smooth, hydrated canvas that allows your lip gloss to glide seamlessly and look polished.
Preparing your lips starts with gentle exfoliation to remove dead skin cells and create an even surface. Proper lip exfoliation techniques involve using soft, natural scrubs like sugar or jojoba beads in circular motions. The goal is to slough away dry, flaky skin without causing irritation. Mix a small amount of fine sugar with a nourishing oil like coconut or jojoba to create a homemade scrub. Massage the mixture gently across your lips using light, circular motions for about 30 seconds, then rinse with lukewarm water.
After exfoliating, immediately apply a hydrating lip balm to seal in moisture and protect your newly smoothed lip surface. This step prevents potential dryness and creates the perfect base for your lip gloss application. Lip prep is crucial for smooth makeup application, ensuring your lip gloss will look fresh and vibrant.
Pro Tip: Limit lip exfoliation to once or twice weekly to avoid over-irritating your delicate lip skin.
Here’s a summary of recommended products and techniques for each lip layering step:
| Step | Recommended Product | Technique Focus | Benefit |
|---|---|---|---|
| Exfoliate | Sugar and oil scrub | Circular gentle motions | Smooth lip surface |
| Hydrate | Nourishing lip balm | Immediate application | Prevent dryness |
| Define | Neutral lip liner | Outline and fill softly | Enhance natural shape |
| Color | Cream lipstick | Thin buildable layers | Even, long-lasting color |
| Gloss | Hydrating lip gloss | Multiple light coats | Fuller shine, no feathering |
Step 2: Apply Lip Liner for Definition
Defining your lips with precision is crucial for creating a polished lip gloss look that appears professional and elegant. Lip liner serves as a strategic tool to enhance your natural lip shape, prevent color bleeding, and create a crisp outline that elevates your overall makeup application.
Lip liner application begins with careful technique that requires patience and attention to detail. Start by selecting a lip liner shade that closely matches your natural lip color or the lipstick you plan to wear. Begin mapping your Cupid’s bow by creating a gentle X shape at the center of your upper lip, then carefully outline your lips using small, light strokes that follow your natural lip line. Work from the center outwards, connecting the lines smoothly and ensuring symmetry. When applying, use a light hand and maintain control to prevent harsh or uneven lines.
The goal is to create definition without looking artificial. Focus on enhancing your natural lip shape rather than dramatically overlining or changing your lip structure. Pay special attention to the corners of your mouth, avoiding exaggerated extensions that can appear unnatural. After outlining, you can optionally fill in your lips with the liner to create a base that helps your lip gloss adhere more effectively and last longer.
Pro Tip: For mature lips, choose a neutral liner shade that blends seamlessly with your natural coloring to achieve a soft, sophisticated definition.
Step 3: Layer Base Lip Color Evenly
Creating a flawless lip color application is an art that requires precision, technique, and patience. Your goal in this step is to develop a smooth, even base that will serve as the foundation for your lip gloss layering technique, ensuring a professional and polished final look.
Lipstick application demands careful preparation and a methodical approach. Begin by using a lip brush or applying directly from the lipstick tube, starting at the center of your lips and working outwards. This technique helps distribute color evenly and prevents uneven patches. For mature skin, select a creamy lipstick formula that glides smoothly without settling into fine lines. Apply the first layer with light, gentle strokes, ensuring complete coverage while maintaining a natural appearance. After the initial application, blot your lips gently with a tissue to remove excess product and create a more refined finish.
To build intensity and longevity, consider layering your lipstick. Apply a thin first layer, blot carefully, then add a second layer for deeper pigmentation. This technique not only enhances color depth but also improves the staying power of your lip color. Pay special attention to maintaining symmetry and avoiding harsh lines, focusing on creating a soft, seamless application that complements your natural lip shape.
Pro Tip: For women over 40, choose a slightly hydrating lipstick formula and apply in thin, buildable layers to prevent color from bleeding or looking heavy.
Step 4: Add Multiple Gloss Coats Strategically
The final step in achieving a luxurious lip look involves strategically applying multiple gloss coats to create dimension, shine, and a professional finish. This technique transforms your lip color from ordinary to extraordinary, adding depth and visual interest that catches the light beautifully.
Begin by selecting a clear or slightly tinted lip gloss that complements your base lip color. Apply the first coat sparingly, focusing on the center of your lips and gently blending outwards. This initial layer should create a subtle sheen without overwhelming your carefully applied lipstick. For women over 40, choose a gloss with hydrating ingredients that prevent feathering and provide a plump appearance. Use a small lip brush or the gloss applicator, tilting it at a 45-degree angle to ensure precise application.
To create a multidimensional effect, consider layering different gloss textures or subtle shimmer glosses. Start with a thin, clear base coat to add shine, then add a second layer with minimal shimmer concentrated in the center of your lips. This technique creates an illusion of fuller lips and draws light to your smile. Blend each layer gently, ensuring no harsh lines or uneven patches disrupt the smooth finish. Take your time with each application, allowing each coat to settle before adding the next.
Pro Tip: For a professional finish, use a clean fingertip to gently press and blend gloss layers, creating a seamless melted effect that looks natural and refined.
Step 5: Check and Refine Gloss Finish
The final stage of your lip gloss layering process involves a careful evaluation and refinement of your overall look. This critical step transforms your application from good to truly professional, ensuring a polished and sophisticated appearance that highlights your natural beauty.
Begin by examining your lip gloss finish in natural lighting, preferably near a window with soft daylight. Look for any uneven patches, excess product buildup, or areas where the gloss may have settled into fine lines. Use a clean cotton swab or soft makeup brush to gently smooth out any inconsistencies, blending the edges and creating a seamless transition between your lipstick and gloss. Understanding gloss finish nuances can help you achieve a more refined result. Pay special attention to the corners of your mouth and the outer edges of your lips, where product can sometimes accumulate or look less precise.
To achieve a truly professional finish, use a clean fingertip to press and blend the gloss gently, creating a soft melted effect that looks natural and dimensional. If you notice any areas that appear too heavy or stark, use a clean lip brush to remove excess product and create a more subdued, elegant look. The goal is to create a luminous finish that enhances your lips without looking overly glossy or artificial.
Pro Tip: Keep a small mirror and clean cotton swab in your makeup bag for quick touch ups, allowing you to refine your gloss finish throughout the day.
Compare key glossy lip layering mistakes and solutions:
| Common Mistake | Impact on Look | Simple Solution |
|---|---|---|
| Over-exfoliation | Red, irritated lips | Limit to 1-2 times weekly |
| Bleeding lip color | Messy, undefined shape | Use lip liner base |
| Gloss buildup | Sticky, uneven finish | Blend with fingertip or brush |
| Patchiness | Uneven shine and color | Check in natural light and smooth edges |
Elevate Your Lip Gloss Application with Expert Care and Quality Products
Achieving that flawless, layered lip gloss look starts with the right preparation and precision. If you struggle with dry lips, uneven color application, or gloss feathering, the solution lies in embracing gentle exfoliation, choosing hydrating formulas, and applying your gloss with finesse. Our LIP OIL – Luméra Cosmetica collection is specially crafted to nourish and soften your lips, creating the perfect base for smooth and long-lasting gloss. Combine this with quality lip liners and hydrating lipsticks, as detailed in the layering process, to prevent bleeding and build rich, even color.
Ready to master the art of lip layering? Discover our full range of products designed to support every step of your makeup routine. Explore the Face Makeup for Every Skin Type | Natural Radiance by Luméra Cosmetica to complement your polished lips with radiant skin. Visit Luméra Cosmetica today and transform your beauty regimen into a professional, radiant experience you can trust.
Frequently Asked Questions
How do I prepare my lips for lip gloss application?
To prepare your lips, start by gently exfoliating them to remove dead skin. Use a mixture of sugar and a nourishing oil, scrub in circular motions for about 30 seconds, then rinse with lukewarm water.
What is the best way to apply lip liner for precision?
Begin by selecting a lip liner that matches your natural lip color. Carefully outline your lips using light, small strokes, starting from the center and moving outward, to create definition without looking artificial.
How can I achieve an even base for my lipstick?
To create an even base, apply lipstick from the center of your lips outward using a lip brush or directly from the tube. Blot your lips gently with a tissue after the first layer, and consider layering for deeper color without harsh lines.
What is the proper technique for layering lip gloss?
Apply the first coat of lip gloss sparingly, focusing on the center of your lips and blending outwards. Use a small lip brush and apply additional layers after allowing each to settle for a multidimensional effect.
How can I fix any gloss imperfections after application?
Check your lip gloss finish in natural light, looking for patches or buildup. Use a clean cotton swab or brush to smooth any inconsistencies, and blend gently with your fingertip for a seamless look.
How often should I exfoliate my lips?
Limit lip exfoliation to once or twice weekly to avoid irritation. This frequency will maintain soft, smooth lips without causing damage.
Recommended
- What is a Gloss Finish Lipstick? Understanding Its Appeal – Luméra Cosmetica
- Understanding Lip Gloss: An Explanation of Its Appeal – Luméra Cosmetica
- Lip Gloss: Everything You Need to Know – Luméra Cosmetica
- How to Apply Lipstick: A Step-by-Step Guide – Luméra Cosmetica
- Organic Natural Makeup by LOLA – The Soap Lab Scotland