

Find Your Perfect Lipstick Shade in Three Simple Tests

Find your perfect lipstick shade by identifying your skin undertone, swatching the color in natural light, and using a virtual try-on to confirm before you buy. That’s the whole process, and you can finish it in under five minutes. Three quick checks tell you almost everything you need to know before you even open a lipstick tube.
- The vein test: look at the veins on your inner wrist. Blue or purple means cool undertone; green means warm; a mix of both means neutral.
- The jewelry test: notice which metal looks better against your skin. Silver flatters cool undertones, gold flatters warm ones, and both work if you’re neutral.
- The white paper test: hold a plain white sheet next to your face. Skin that looks yellow or golden against it leans warm; skin that looks pink or rosy leans cool.
Pro Tip: If you’re stuck between two undertones, you’re probably neutral, and that’s good news. Neutral undertones can wear almost any shade family, including dusty rose and balanced true reds.
Once you know your undertone, a “my lips but better” (MLBB) shade or a balanced true red is a safe place to start testing. From there, the article walks through swatching technique, virtual try-on tools, shade families by depth, finish selection, and how to fix the lipstick problems that ruin an otherwise great color choice.
Key Takeaways
Finding your perfect lipstick shade comes down to identifying your undertone, swatching in natural daylight, and confirming with a virtual try-on before you commit to a purchase.
| Point | Details |
|---|---|
| Test undertone first | Use the vein, jewelry, and white paper tests together to confirm warm, cool, or neutral undertone. |
| Swatch on skin, not hands | Test lipstick on your jawline or lips in natural light and wait a few minutes for oxidation. |
| Use virtual try-on to narrow | Preview shades digitally, but validate the top choices with a real swatch before buying. |
| Match finish to occasion | Matte reads deeper, gloss reads brighter; choose finish based on skin type and event. |
| Start with Lumeracosmetica | Browse undertone-organized shade collections and Rebecca’s guides for a faster, informed pick. |
Table of Contents
- How to Find Your Perfect Lipstick Shade by Undertone and Depth
- How to Swatch Lipstick the Right Way in Natural Light
- How to Use Virtual Try-On Tools to Confirm Your Shade
- Which Lipstick Shades Flatter Warm, Cool, and Neutral Skin
- Should You Choose Matte, Satin, or Gloss Finish?
- Rebecca’s Expert Tips and Lumeracosmetica Resources
- Lipstick Application Tips That Make Your Shade Pop
- Fixing Feathering, Fading, and Other Lipstick Problems
- How to Keep Lips Healthy So Lipstick Looks Its Best
- Matching Your Lipstick to the Occasion and Outfit
- How Your Hair and Eye Color Affect Lipstick Choice
- Why the Simple Rules Still Beat the Complicated Ones
- Explore Curated Shade Guidance From Lumeracosmetica
- Sources
How to Find Your Perfect Lipstick Shade by Undertone and Depth
Undertone is the color beneath your skin’s surface, the one that doesn’t change with a tan or a winter fade. Skin depth is simply how light or dark your skin is right now. You need both pieces of information, because two people with the same depth of skin can need completely different lipstick families if their undertones don’t match.
Here’s why this matters more than most shoppers realize: a lipstick that looks stunning in the tube can look muddy or chalky on your lips if it fights your undertone. Identifying your undertone through a few simple checks is the single move that narrows thousands of shade options down to a manageable handful.
- Check your veins in daylight. Natural light near a window gives the truest read. Blue or purple veins point to cool undertones. Green veins point to warm. If you genuinely can’t decide, you likely have a neutral undertone.
- Test the jewelry preference. Lay a gold piece and a silver piece against your wrist or collarbone. The metal that makes your skin look brighter and healthier, rather than sallow or washed out, is your tell.
- Try the white paper test. Hold up a plain white sheet of paper under your chin in natural light. Golden or yellow-tinted skin against the white background usually means warm undertone. Pink or rosy skin means cool.
- Factor in your tanning and burning history. People who tan easily and rarely burn often lean warm. People who burn quickly and tan reluctantly often lean cool. This isn’t a perfect rule, but it helps confirm a borderline result.
- Combine undertone with depth. Once you know if you’re warm, cool, or neutral, place yourself on a fair, medium, or deep spectrum. A warm undertone on fair skin wants a lighter peach or coral, while a warm undertone on deep skin can carry a rich terracotta or brick red.
Mixed signals are normal. Plenty of people get a “cool” answer from the vein test and a “warm” answer from the jewelry test. When that happens, trust the white paper test as your tiebreaker, since it’s the closest thing to seeing your undertone directly against a neutral background.
Pro Tip: Take a photo of your wrist next to the white paper in natural daylight. Phone cameras often reveal undertone more clearly than your eye does in the moment, especially indoors under warm bulbs.
How to Swatch Lipstick the Right Way in Natural Light
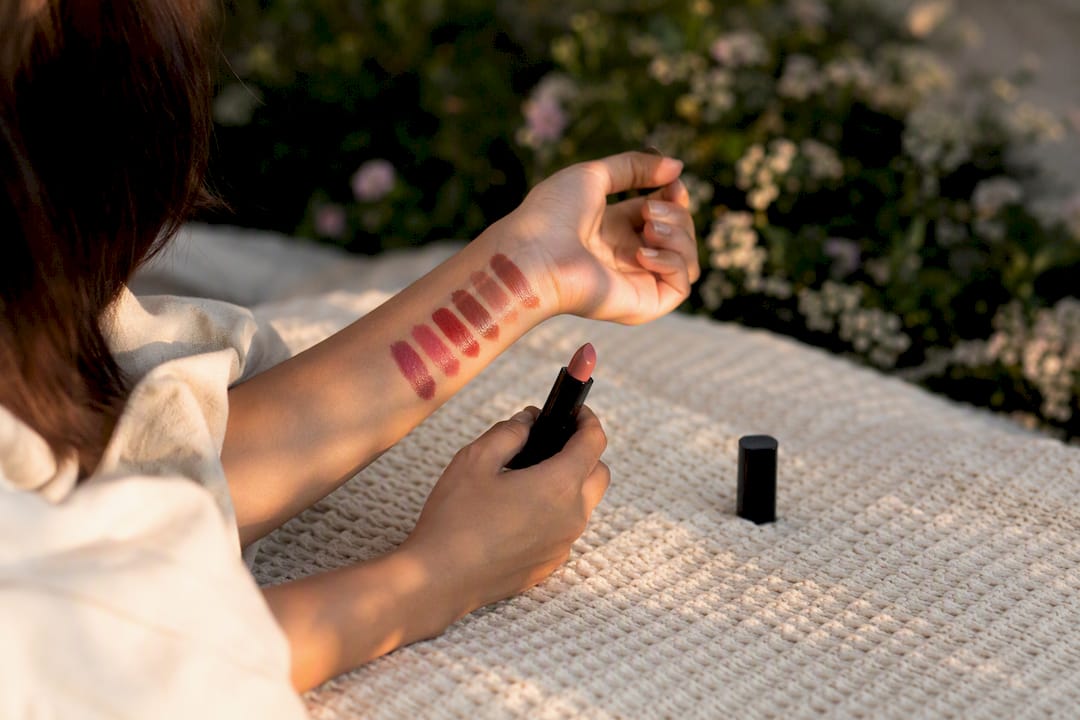
Swatching is where good shade research either pays off or falls apart. Skip this step and you’re gambling on a photo filter or a store’s fluorescent lighting doing you any favors.
Start with clean, slightly exfoliated, moisturized lips. Dry or flaky skin changes how pigment sits and can make even a perfect shade look patchy or uneven. A thin layer of lip balm ten minutes before you swatch gives you a fairer read of the true color.
- Swatch on your jawline or directly on your lips, not the back of your hand. Your hand’s skin tone rarely matches your face, so testing on the jawline or lips gives you a far more accurate preview of how the shade will actually look.
- Step outside or near a window. Store lighting and phone flashlights distort color constantly, sometimes shifting a soft rose into something closer to orange. Natural daylight is the closest thing to a neutral, honest light source.
- Wait two to three minutes before judging the color. Lipstick oxidizes on contact with skin, and the shade you see the moment you apply it isn’t always the shade you’ll wear for the next few hours.
- Photograph the swatch in at least two lighting setups. Try natural daylight and one indoor light. Comparing photos side by side later removes the guesswork of relying on memory.
- Judge your contrast level before committing. If your hair and eyes are dramatically darker or lighter than your skin, you likely have high contrast and can carry bold, saturated shades. Low contrast coloring, where hair, eyes, and skin sit closer in tone, usually looks more polished in a shade one or two tones deeper than your natural lip color.
Pro Tip: Swatch three candidates in a vertical line on your jawline instead of testing one at a time. Side-by-side comparison in the same light is far more reliable than judging shades hours or days apart.
How to Use Virtual Try-On Tools to Confirm Your Shade
Virtual try-on has gotten good enough to replace a lot of guesswork, but it’s a narrowing tool, not a final verdict. Treat it the way you’d treat a friend’s opinion: useful, worth weighing, not the last word.
There are two main formats. Live camera try-on tracks your face in real time and lets you swipe through shades instantly, which is great for quick comparisons. Photo upload tools apply the shade to a still image, which tends to give a steadier, less jittery preview, especially useful for judging finish.
Both formats share the same weak spot. Lighting and screen calibration can shift how a shade renders, so a lipstick that looks perfectly rosy on your laptop might look orange on your phone. A few habits fix most of that:
- Use natural daylight when taking your reference photo, the same way you would for a physical swatch.
- Turn off any beauty filter or automatic skin smoothing before uploading a photo.
- Try the same shade in at least two finishes (matte and satin, for example) since virtual renders sometimes flatten finish differences.
- Save two or three top candidates side by side rather than trusting your memory of the first one you liked.
If a shade looks promising on screen but you’re still unsure, that’s the moment to book a virtual consultation or visit a counter for an in-person comparison. Digital previews are excellent at eliminating shades that clearly don’t work. They’re less reliable at confirming the one that’s genuinely best on you.
Pro Tip: Screenshot your top three virtual try-on results and open them all at once. Seeing them together, rather than swiping between them, makes the differences in undertone and finish much easier to spot.
Which Lipstick Shades Flatter Warm, Cool, and Neutral Skin
Once your undertone is settled, shopping gets dramatically simpler. Here’s how the three undertone families break down by skin depth, based on makeup artist recommendations for undertone-matched shades.
Warm undertones look best in shades with golden, peachy, or orange bases.
- Fair skin: soft peach, warm nude, coral pink.
- Medium skin: terracotta, warm coral, brick orange-red.
- Deep skin: rich brick red, warm chocolate brown, burnt orange.
Cool undertones are flattered by shades with blue or pink bases rather than orange or gold.
- Fair skin: cool pink, soft berry, blue-based rose.
- Medium skin: berry, mauve, cool-toned red.
- Deep skin: deep plum, blackberry, blue-red.
Neutral undertones sit in the flexible middle and can pull from both families, which is exactly why makeup artists so often reach for the same handful of neutral-friendly shades.
- Fair to medium skin: dusty rose, balanced true red, soft mauve.
- Deep skin: rosewood, muted berry, warm-cool blended reds.
If you only remember one rule from this entire guide, make it this one: a lipstick one or two shades deeper than your natural lip color reads as effortless rather than costume-like, and it works across nearly every undertone and depth combination. Balanced true reds and dusty rose shades earn their reputation as universal picks precisely because they split the difference between warm and cool, flattering far more people than a shade pulled hard toward one end of the spectrum.
One small but genuinely useful detail: blue-based reds create visual contrast that tends to make teeth look whiter, while orange or yellow-toned reds can bring out yellow tones in enamel. If you’re choosing a red for a big event with a lot of photos, that’s worth factoring in alongside undertone.
Should You Choose Matte, Satin, or Gloss Finish?
The finish you pick changes how the exact same pigment reads on your lips, which is why two people can swatch the same shade name and walk away with completely different opinions of it.
Matte finishes tend to read deeper and more saturated than the same pigment in a gloss, and matte often flatters lighter skin by adding definition without shine. Satin sits in the middle, offering some depth of color with a soft sheen that suits most skin types and most occasions. Gloss increases perceived brightness and can make a shade look lighter and more sheer than it actually is, which matters if you’re judging a swatch photo and wondering why the color looks different from what you expected in the tube.
Formula choice matters as much as finish. Mature or drier lips generally do better with hydrating satin or cream formulas, since heavy mattes can settle into fine lines and emphasize texture. Oilier lip textures or all-day wear needs often call for transfer-resistant formulas that won’t migrate by lunchtime. Our guide on kinds of lipstick for different lip types breaks this down further for anyone dealing with dryness or fine lines.
- Line lips first with a matching liner to extend wear and sharpen the edge, especially with matte formulas.
- Blot after the first layer, then reapply a thin second coat for color that lasts without looking cakey.
- Add a clear balm topcoat over matte finishes if your lips feel tight or if you want a slight sheen back.
- When comparing swatch photos, look specifically at how light reflects off the surface. That reflection, not just the pigment, tells you whether you’re really looking at matte, satin, or gloss.
Pro Tip: If a swatch photo online looks flat and one-dimensional, it’s probably matte. If it looks like it’s catching light in a small highlight, that’s satin or gloss. Use that visual cue when you can’t read the product description clearly.
Rebecca’s Expert Tips and Lumeracosmetica Resources
, and her advice consistently comes back to one theme: rules are a starting point, not a cage. She points out that women over 40 often gravitate toward the same handful of “safe” shades out of habit, when a slightly warmer or more pigmented option would actually flatter changes in lip texture and color that come with age. Her recommendations for that group live in 7 must-have lipstick shades for women over 40, built around exactly this idea.
Undertone and contrast tell you where to start looking. They don’t tell you where to stop. The shade that makes you smile back at yourself in the mirror is still the right answer, even if it breaks a rule.
… For a deeper walkthrough of undertone matching, Rebecca’s full piece on how to choose lipstick colour covers ground this guide only touches on.
Lipstick Application Tips That Make Your Shade Pop
The right shade can still look wrong if the application undercuts it. A few small habits make the biggest visible difference.
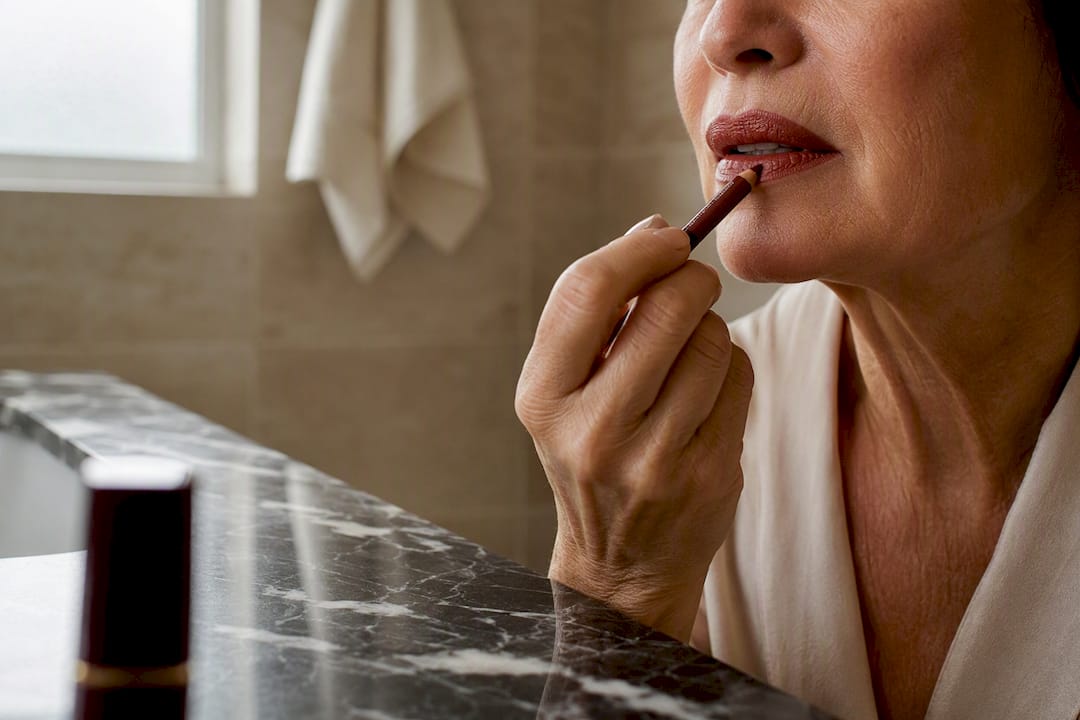
Start with a lip liner in a shade that matches or sits one tone away from your lipstick. Liner isn’t just about preventing feathering, it also sharpens the lip shape, which makes color look more intentional and saturated. For step-by-step guidance on pairing the two correctly, matching lip liners and lipsticks like a pro walks through common pairing mistakes.
Apply lipstick from the center of the lip outward, following your natural line rather than overdrawing it, unless you’re deliberately using liner to adjust shape. A thin first coat, blotted with a tissue, sets a base layer that helps the second coat go on smoother and last longer.
Cool or blue-based shades tend to look their most vivid against clean, well-hydrated lips, since dryness dulls pigment and creates patchiness. Warm shades are more forgiving of minor texture but still benefit from a smooth base.
If you’re wearing a bold or deep shade, a small dab of concealer at the very edge of the lip line cleans up any minor unevenness and makes the whole look read as more precise. For sheer or gloss finishes, skip heavy liner altogether. It tends to show through and create an obvious ring that undercuts the soft effect you’re going for.
Reapply strategically rather than fully. A quick blot and a thin fresh layer after eating usually restores the look faster and cleaner than removing everything and starting over.
Fixing Feathering, Fading, and Other Lipstick Problems
Feathering, where color bleeds into the fine lines around your lips, is almost always a hydration and prep issue rather than a product flaw. Lips that are dry or flaky create tiny channels for pigment to travel into as the day goes on. Exfoliating gently once or twice a week and applying a liner as a barrier around the lip edge solves most feathering before it starts.
Fading in the center of the lips, where you eat and drink most, is normal wear and tear rather than a sign the lipstick is failing. Blotting after the first coat and applying a thin second layer builds up pigment in a way that survives longer than one heavy coat. Long-wear or transfer-resistant formulas help here too, and our long-lasting lipstick method for all-day wear breaks down the layering technique in more detail.
Patchy or uneven color usually traces back to dry patches on the lip itself rather than uneven application. If you notice one spot consistently looking lighter or duller, that’s a hydration issue, not an application mistake.
Color transferring onto teeth is a quick fix: after applying, put your finger in your mouth and pull it out slowly, closing your lips around it. This removes the excess product most likely to transfer without disturbing the outer layer.
If a shade oxidizes into something noticeably different than what you swatched, that’s a formula and pH interaction, not user error. This is exactly why the two to three minute wait during swatching matters so much. It shows you the true color before you’ve committed.
How to Keep Lips Healthy So Lipstick Looks Its Best
Lipstick performs best on lips that are already in good condition, which makes lip care less of an optional extra and more of a prerequisite. Dry, flaky, or cracked lips grab pigment unevenly and make even an expensive formula look patchy by midday.
Gentle exfoliation once or twice a week removes dead skin without over-scrubbing, which can create micro-tears that sting under color. A soft washcloth or a dedicated lip scrub both work fine; the key is consistency, not intensity.
Hydration matters more than most people budget time for. A nourishing balm at night, ideally with an occlusive ingredient that locks in moisture while you sleep, gives lipstick a smoother base to grip the next morning. Natural, plant-based primers and balms have grown popular for exactly this reason, since they condition lips without leaving a heavy film that interferes with color. Natural tallow-based primers are one option worth knowing about if you prefer minimal-ingredient formulas under your lip color.
Sun protection on lips is easy to skip and genuinely important, since sun damage dries and thins lip skin over time, making feathering and unevenness more likely. A balm with SPF during the day protects color longevity as much as it protects your skin.
Finally, drink water consistently rather than only when your lips feel dry. Internal hydration shows up on lip texture days later, not minutes later, so consistency beats a last-minute fix.
Matching Your Lipstick to the Occasion and Outfit
The undertone rules stay fixed, but how bold you go depends on where you’re headed and what you’re wearing. A workday calls for something different than a wedding, even if your undertone hasn’t changed at all.
For everyday wear and office settings, a medium-depth MLBB shade or a soft satin finish reads polished without demanding attention. It pairs easily with almost any outfit color, which is exactly why this category earns its reputation as the low-effort, high-payoff choice.
For evening events, a deeper or more saturated version of your undertone family works well, especially in matte or satin finish. A cool undertone might go from soft berry in the daytime to a deep plum at night; a warm undertone might shift from peachy nude to terracotta or brick.
Bold outfits with strong patterns or saturated colors generally look better with a more neutral or muted lip, since a bright lipstick competing with a busy print creates visual noise rather than polish. Simple, monochrome, or neutral outfits give you more room to go bold with lip color, since the lip becomes the outfit’s focal point rather than one of several competing elements.
For special occasions like weddings or formal photography, a blue-based red or berry tends to photograph more reliably than an orange-based shade, which can shift unpredictably under flash or warm venue lighting. Testing your shade under the actual lighting you’ll be photographed in, even briefly, beats guessing.
How Your Hair and Eye Color Affect Lipstick Choice
Undertone determines the shade family. Hair and eye color determine how much contrast you can carry within that family, which is why two people with identical undertones can look completely different wearing the same lipstick.
High contrast coloring, like dark brown or black hair paired with fair skin, or very light hair with deep skin, tends to carry bold, saturated shades beautifully. The lipstick has other strong features to play off, so a deep berry or a vivid red looks intentional rather than overwhelming.
Low contrast coloring, where hair color sits closer to your skin tone, such as light brown hair on medium skin, generally looks more balanced in muted or medium-depth shades. A saturated bold red can look slightly harsh against low contrast features, while the same shade in a softer, muted version reads as effortlessly put together.
Eye color plays a smaller but real supporting role. Warm brown or hazel eyes often pair beautifully with warm-toned lipsticks, amplifying the golden flecks. Blue or green eyes can pop against cooler shades, particularly berries and rose tones, through simple color contrast. None of this overrides undertone matching, but it’s a useful tiebreaker when you’re deciding between two shades that both technically work for your skin.
Why the Simple Rules Still Beat the Complicated Ones
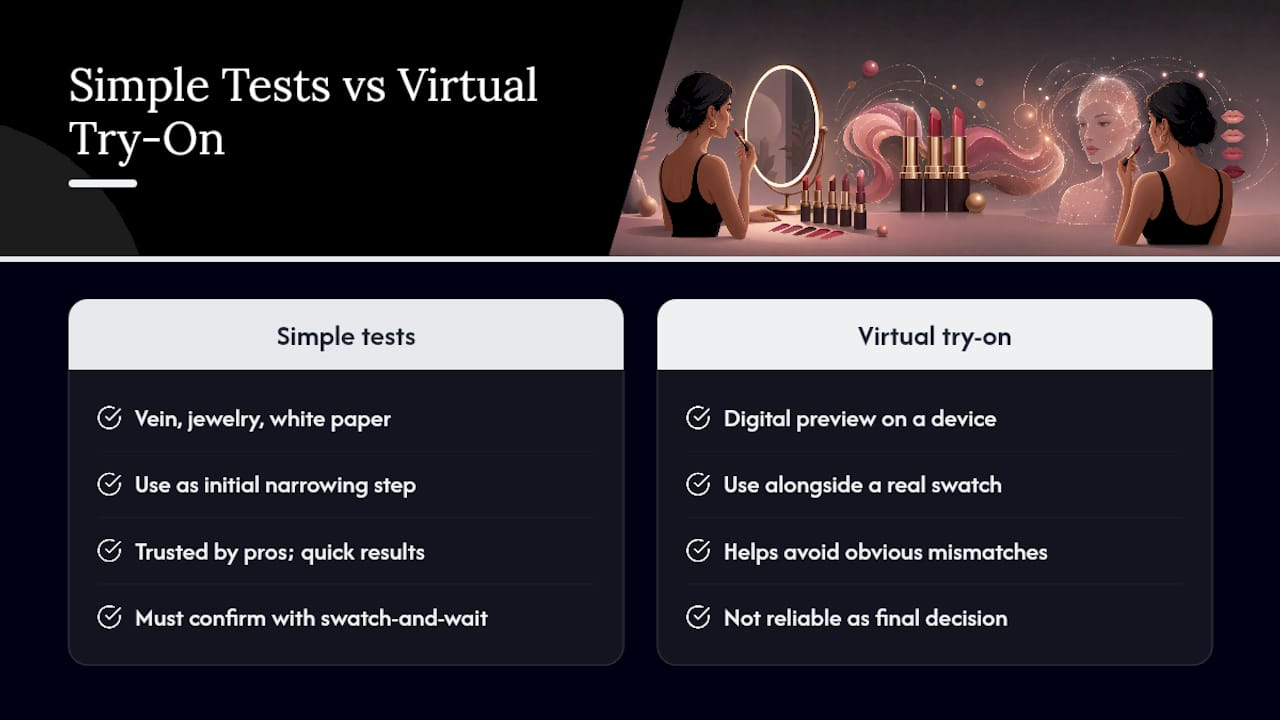
Most lipstick advice overcomplicates a process that genuinely takes five minutes. The vein test, the jewelry test, and the white paper test aren’t beginner shortcuts you graduate past. They’re the same tools professional makeup artists reach for, because they work.
Where conventional advice falls short is treating virtual try-on as either useless or infallible. It’s neither. Used as a narrowing step, alongside a real swatch in daylight, it saves you from buying shades that were never going to work. Used as a final decision without ever touching a swatch to your actual lips, it sets you up to be disappointed by oxidation or lighting you didn’t account for.
If you take one thing from this guide, prioritize the swatch-and-wait step over everything else. Undertone theory gets you close. The two or three minutes you spend watching a color oxidize on your jawline is what actually confirms it. Skip that step and you’re still guessing, no matter how good your undertone research was.
Explore Curated Shade Guidance From Lumeracosmetica
You now have the framework professional makeup artists use, but matching it against a curated shade range still saves time compared to scrolling through hundreds of options with no filter. Lumeracosmetica organizes its lipstick collection around exactly the undertone and depth categories covered in this guide, so once you know whether you’re warm, cool, or neutral, finding your next shade becomes a much shorter search.
Rebecca’s blog posts dig deeper into specific scenarios, from must-have shades for women over 40 to formula breakdowns for different lip textures, and they’re worth a read if you want more than the basics. If you’d rather skip the research and go straight to curated recommendations built around your undertone, visit Lumeracosmetica to browse the shade collection and find the pick that matches what you learned here.
Sources
- How to find the right lipstick shade, by a make-up artist | Woman & Home
- How to Pick Lipstick Color: A Guide for Every Skin Tone
- Lipstick Shade Finder | Lipstick Virtual Try On
- What Color Lipstick Should I Wear? Try These Makeup Artist Picks | InStyle


