

Finding a lip balm that actually heals and protects can feel impossible when dryness strikes, especially for women over 40 in Australia and the UK. Keeping lips soft and comfortable is more than cosmetic, since environmental stress and age increase sensitivity. Learn how clean lips absorb lip balm more effectively and discover gentle routines plus natural ingredients that nurture and rejuvenate mature lips for noticeable, long-lasting results.
Table of Contents
- Step 1: Cleanse Your Lips Thoroughly
- Step 2: Select the Best Natural Lip Balm
- Step 3: Apply Lip Balm Evenly
- Step 4: Check for Smooth, Hydrated Results
Quick Summary
| Key Takeaway | Explanation |
|---|---|
| 1. Cleanse lips properly | Remove dead skin and buildup for better balm absorption. |
| 2. Choose natural balms | Opt for organic ingredients that nourish and protect lips. |
| 3. Apply evenly and lightly | Use minimal product for smooth coverage without excess. |
| 4. Monitor hydration levels | Check lip comfort hours after application for effective care. |
| 5. Track improvements visually | Take daily photos to observe subtle changes in lip texture. |
Step 1: Cleanse Your Lips Thoroughly
Think of your lips as a blank canvas. Before applying lip balm, you need to prepare the surface by removing dead skin cells and any buildup that prevents proper hydration. This simple step makes a dramatic difference in how well your lip balm actually works.
Start by gently washing your lips with lukewarm water and a soft cleanser. Use your fingertip or a damp washcloth to lightly massage your lips in circular motions. This removes surface dirt, old lip product residue, and environmental irritants that have accumulated throughout the day.
For stubborn dead skin, use a soft toothbrush or gentle lip scrub. Dampened soft bristles work best. Brush your lips with light pressure for about 5-10 seconds, moving in gentle circular motions rather than back and forth. This exfoliates without causing irritation or micro-tears.
Why does this matter? Removing dead skin flakes creates a smooth surface for your lip balm to adhere to, which improves how well it moisturizes and heals your lips. Pat your lips dry with a clean, soft tissue or towel. Avoid rubbing harshly.
Once clean and dry, your lips are ready to absorb what comes next. Many people skip this step entirely, which is why their lip balm feels like it sits on top rather than actually nourishing. The cleansing step transforms everything.
Know what to avoid during cleansing:
- Rough washcloths or aggressive scrubbing (causes inflammation)
- Lip products containing menthol, camphor, or eucalyptus (these irritate dry lips further)
- Hot water (use lukewarm instead)
- Fragranced cleansers (stick to gentle, unscented options)
Clean lips absorb lip balm more effectively, allowing ingredients like ceramides and shea butter to penetrate deeply rather than sitting on the surface.
Pro tip: Cleanse your lips every morning and evening as part of your routine, not just before applying balm. This consistent habit prevents buildup and keeps your lips naturally smoother throughout the week.
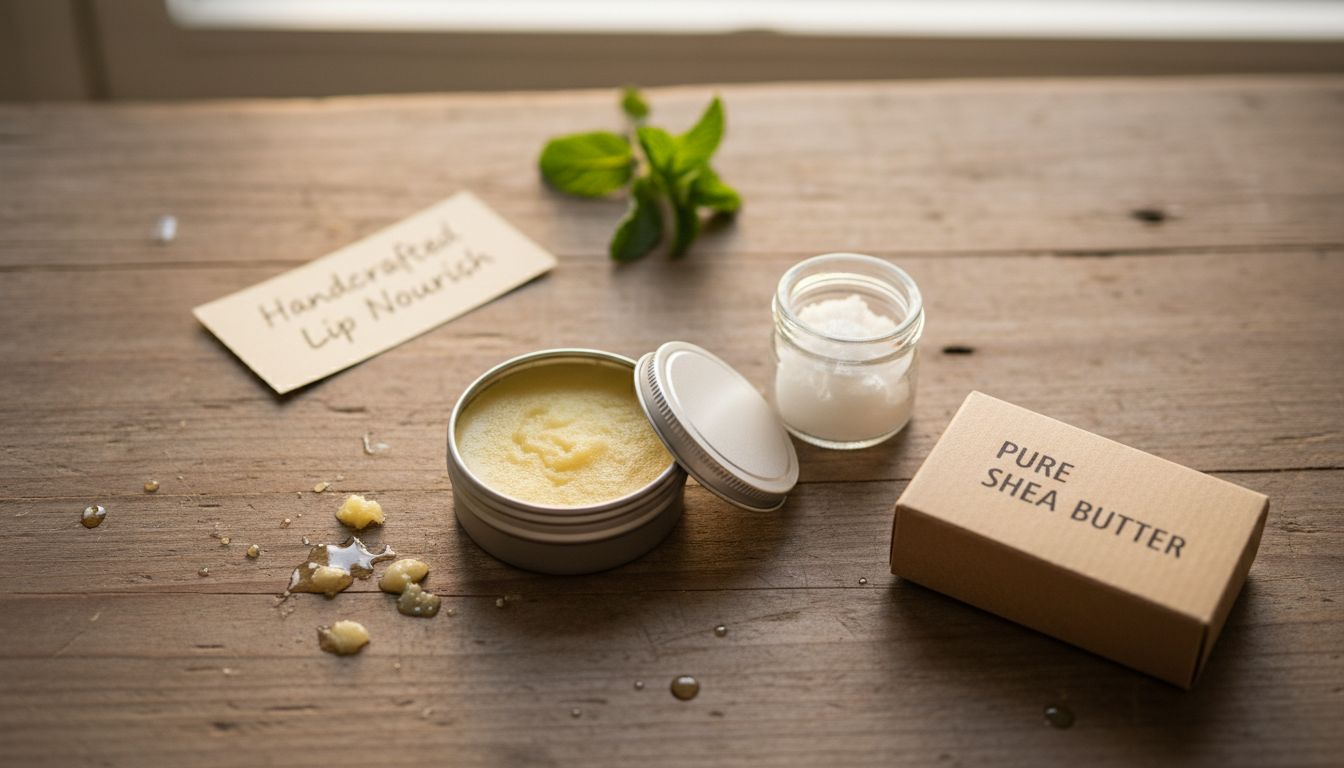
Step 2: Select the Best Natural Lip Balm
Not all lip balms are created equal. The difference between a product that truly nourishes your lips and one that merely sits on the surface comes down to ingredients. At 40 and beyond, your lips need real nourishment, not empty promises.
Start by reading the ingredient list carefully. Look for natural, organic ingredients that your skin recognizes and tolerates well. The best formulations contain oils like coconut, jojoba, or olive oil paired with butters such as shea or mango butter. These provide genuine hydration and long-lasting moisture.
Beeswax and candelilla wax are your friends. These natural waxes seal in moisture and create a protective barrier against harsh weather and environmental damage. They work differently than synthetic alternatives, which can leave your lips feeling waxy without actual nourishment.
What should you actively avoid? Products containing synthetic fragrances, parabens, and artificial preservatives often trigger irritation, especially on already-sensitive mature lips. Even if a product smells appealing, that fragrance may be causing more harm than good. Check labels carefully.
Here’s a quick comparison of natural vs. synthetic lip balm ingredients:
| Ingredient Type | Primary Benefit | Common Examples | Likely Reaction on Mature Lips |
|---|---|---|---|
| Natural Oils/Butters | Deep hydration | Shea butter, coconut oil | Nourishes and softens gently |
| Natural Waxes | Moisture barrier | Beeswax, candelilla wax | Protects without irritation |
| Synthetic Additives | Artificial scent, feel | Parabens, fragrance | May cause dryness or stinging |
Look for these beneficial additions:
- Rose oil (anti-inflammatory and soothing)
- Vitamin E (protects and heals)
- Shea butter (deeply moisturizing)
- Herbal ingredients (reduce adverse reactions)
Natural oils for lips provide anti-inflammatory and healing properties that synthetic alternatives cannot match. These formulations reduce the risk of irritation while keeping your lips soft, hydrated, and protected.
Consider your skin’s sensitivity level. If you have very reactive lips, start with products featuring fewer ingredients. Simpler formulations with minimal additives tend to work best for mature, sensitive skin. You can always expand your routine once you know what works.
Natural lip balms with quality oils and butters deliver visible results because the ingredients actually penetrate and heal rather than just coating the surface.
Pro tip: Buy small quantities first to test compatibility before committing to larger containers. What works beautifully for your friend may not suit your unique skin chemistry, so patch testing saves money and frustration.
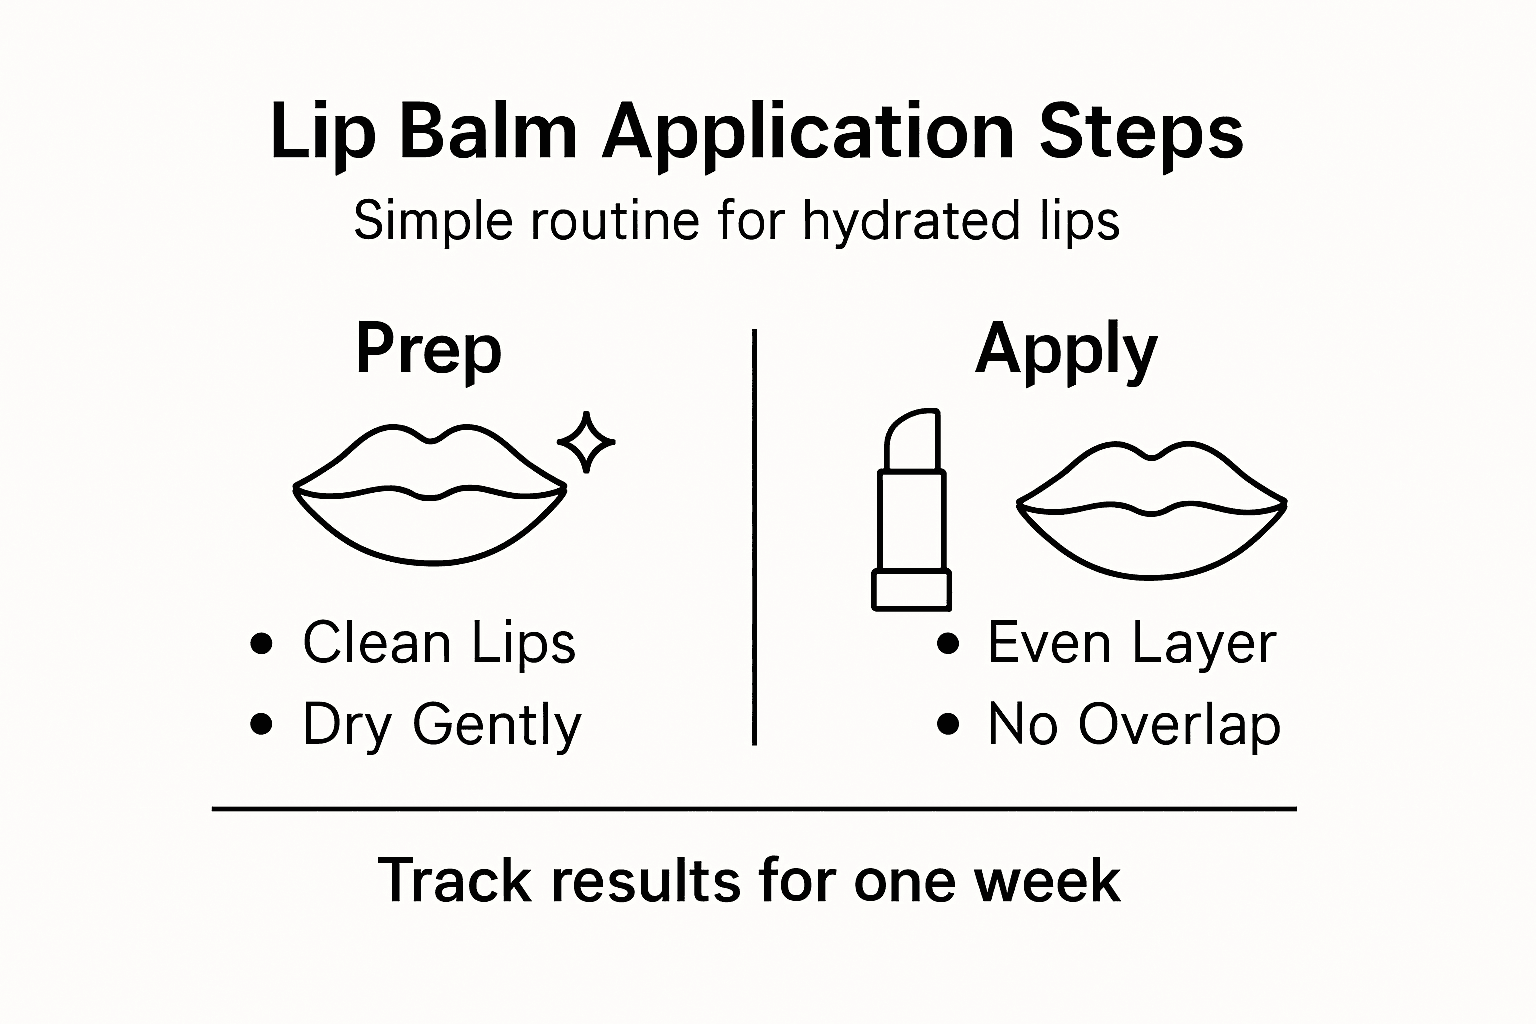
Step 3: Apply Lip Balm Evenly
Application technique matters just as much as the product itself. Even the best lip balm won’t deliver results if you apply it unevenly or use too much product. The goal is complete coverage with a thin, uniform layer.
Start with clean, dry lips as your foundation from the previous step. Take your lip balm stick or fingertip and apply one or two gentle swipes across your lips. Move smoothly from one corner to the other, covering your entire lip surface in a single direction.
Don’t go back and forth repeatedly. Layering the same area multiple times creates buildup, making your lips look patchy or overly glossy. One or two passes is sufficient. This technique ensures even coverage across your entire lip surface with minimal product waste.
If using a lip balm stick, press it gently against your lips rather than swiping hard. You want the product to transfer smoothly without tugging your delicate lip skin. If using a fingertip, warm the balm slightly between your fingertip and thumb first, then gently press and blend across your lips.
Make sure you cover these often-missed areas:
- The corners where your lips meet your mouth
- The inner edges along your lip line
- Both the upper and lower lips completely
- The center area, which tends to absorb moisture fastest
The balm should create a protective barrier that seals in moisture without feeling heavy or greasy. Your lips should look naturally enhanced, not coated. If they feel sticky or overly slick, you’ve used too much.
Reapply after eating, drinking, or anytime you notice dryness returning. Rather than adding more product, use light pressure and smooth it across what remains. This maintains hydration throughout the day without overwhelming your lips.
The best application technique uses minimal product applied smoothly in one or two passes, creating an even protective layer that truly nourishes rather than just sitting on the surface.
Pro tip: Keep your lip balm at room temperature for easiest application. Cold balms feel stiff and require more pressure to apply evenly, while slightly warm balms glide smoothly across your lips with just a gentle touch.
Step 4: Check for Smooth, Hydrated Results
The real test of your lip balm routine comes minutes and hours after application. Your lips will tell you immediately whether your approach is working or needs adjustment. Learn to recognize the signs of success.
Right after applying your lip balm, your lips should feel soft and supple immediately. Run your finger across your lips gently. They should feel smooth without any rough patches or flaking. If you still notice dry spots or texture, you may need to adjust your cleansing technique or product choice.
Now wait a few hours. This is where effective lip care truly shows results. Lips that remain hydrated for several hours00222-4/fulltext) after application indicate your lip balm is actually working and creating a proper moisture barrier. Poor products let your lips dry out within minutes.
See how lip comfort and appearance change over time with proper care:
| Time After Application | Lip Feel | Visible Appearance | Next Steps |
|---|---|---|---|
| 0-5 minutes | Soft, supple | Smooth, no flaking | No action needed |
| 2-3 hours | Still hydrated | Slight natural shine | Reapply if needed |
| 5+ hours | Comfortable, less dry | Fewer lines, plumper look | Refresh if dryness felt |
Check for these positive signs throughout your day:
- No dryness or cracking even after meals
- Comfortable lips without tightness or pulling sensation
- No burning or stinging from your lip balm product
- Natural shine that looks youthful, not greasy
- Lips feel plump and soft to the touch
Pay attention to how your lips feel when you eat, drink, or expose them to weather. Does the balm stay put and protect, or does it wear away immediately? Quality formulations maintain their protective layer through normal daily activities.
If your lips feel uncomfortable, reassess your choices. Burning or stinging indicates irritation from ingredients or application pressure. Persistent dryness suggests your product lacks sufficient nourishing oils or you need more frequent reapplication.
After consistent use over several days, mature lips should show visible improvement. Lips appear smoother, lines soften slightly, and that papery texture fades. This transformation takes patience but happens when you use the right product correctly.
Truly hydrated lips feel comfortable all day without that tight, parched sensation, and they maintain softness even after eating or drinking without constant reapplication.
Pro tip: Track your lip condition for one week by taking photos in the same lighting each morning. You’ll notice subtle improvements in smoothness and plumpness that feel small day-to-day but become obvious when you compare photos side by side.
Unlock Soft and Youthful Lips with the Right Care and Natural Products
If you want to overcome dryness, irritation, and uneven balm application that keep your lips from looking their best then it is crucial to focus on proper cleansing, selecting nourishing ingredients, and perfect application techniques. This article highlights how delicate lip skin deserves natural oils and butters that truly penetrate instead of just sitting on the surface. Discover how choosing the right product transforms your routine into one that promotes deep hydration for visibly smoother and more youthful lips.

Ready to elevate your lip care routine with natural nourishment? Explore our premium Lip Oil – Luméra Cosmetica collection designed to deliver intense moisture and protection using organic blends that soothe and heal mature lips. Pair it with gentle Face Makeup for Every Skin Type | Natural Radiance by Luméra Cosmetica for a hydrated and radiant look that lasts all day. Begin your journey now at Luméra Cosmetica and experience lips that feel soft, comfortable, and visibly revitalized starting today.
Frequently Asked Questions
How can I prepare my lips before applying lip balm?
Start by cleaning your lips to create a smooth surface. Use lukewarm water and a gentle cleanser, massaging your lips in circular motions to remove dead skin and buildup.
What ingredients should I look for in a natural lip balm?
Focus on ingredients like coconut oil, jojoba oil, and shea butter for effective hydration. Choose products with natural waxes such as beeswax to seal in moisture and protect your lips.
How should I apply lip balm for the best results?
Apply a thin, even layer of lip balm with one or two smooth swipes across your lips. Avoid going back and forth to prevent buildup and ensure uniform coverage for better moisture retention.
How do I know if my lip balm is working?
Your lips should feel soft and supple immediately after application and remain hydrated for several hours. If they retain moisture without dryness, your lip balm is likely effective.
How often should I reapply lip balm?
Reapply lip balm after eating or drinking, or whenever you notice dryness. To maintain hydration, consider applying it every few hours throughout the day, especially in dry or cold conditions.
What signs indicate that I need to change my lip balm?
If you experience burning, stinging, or persistent dryness, it may be time to reassess your lip balm. Look for high-quality, natural ingredients that suit your skin sensitivity for better comfort and hydration.
Recommended
- Soft Lipstick Benefits for Mature Lips – Luméra Cosmetica
- Creamy Lipgloss: Revitalize Mature Lips Instantly – Luméra Cosmetica
- Quick Lip Makeup Routine for Effortless Beauty Results – Luméra Cosmetica
- Soft Touch Lipstick: Comfort and Hydration Redefined – Luméra Cosmetica
- How to Preserve Smile Design for Long-Lasting Aesthetics
- 7 beneficii esențiale ale esteticii dentare pentru adulți
- The Ultimate Guide to Dental Veneers: Transform Your Smile with Veneers - Paynless Dental Clinic