

Rushing from one task to the next often leaves little time for complicated makeup routines. Many women in Australia and Europe want quick ways to create polished, youthful lips without fuss. By focusing on a few simple techniques like gentle exfoliation, deep hydration, and smart product choices, you can achieve lasting lip color and confident definition that keep you looking fresh and sophisticated all day.
Table of Contents
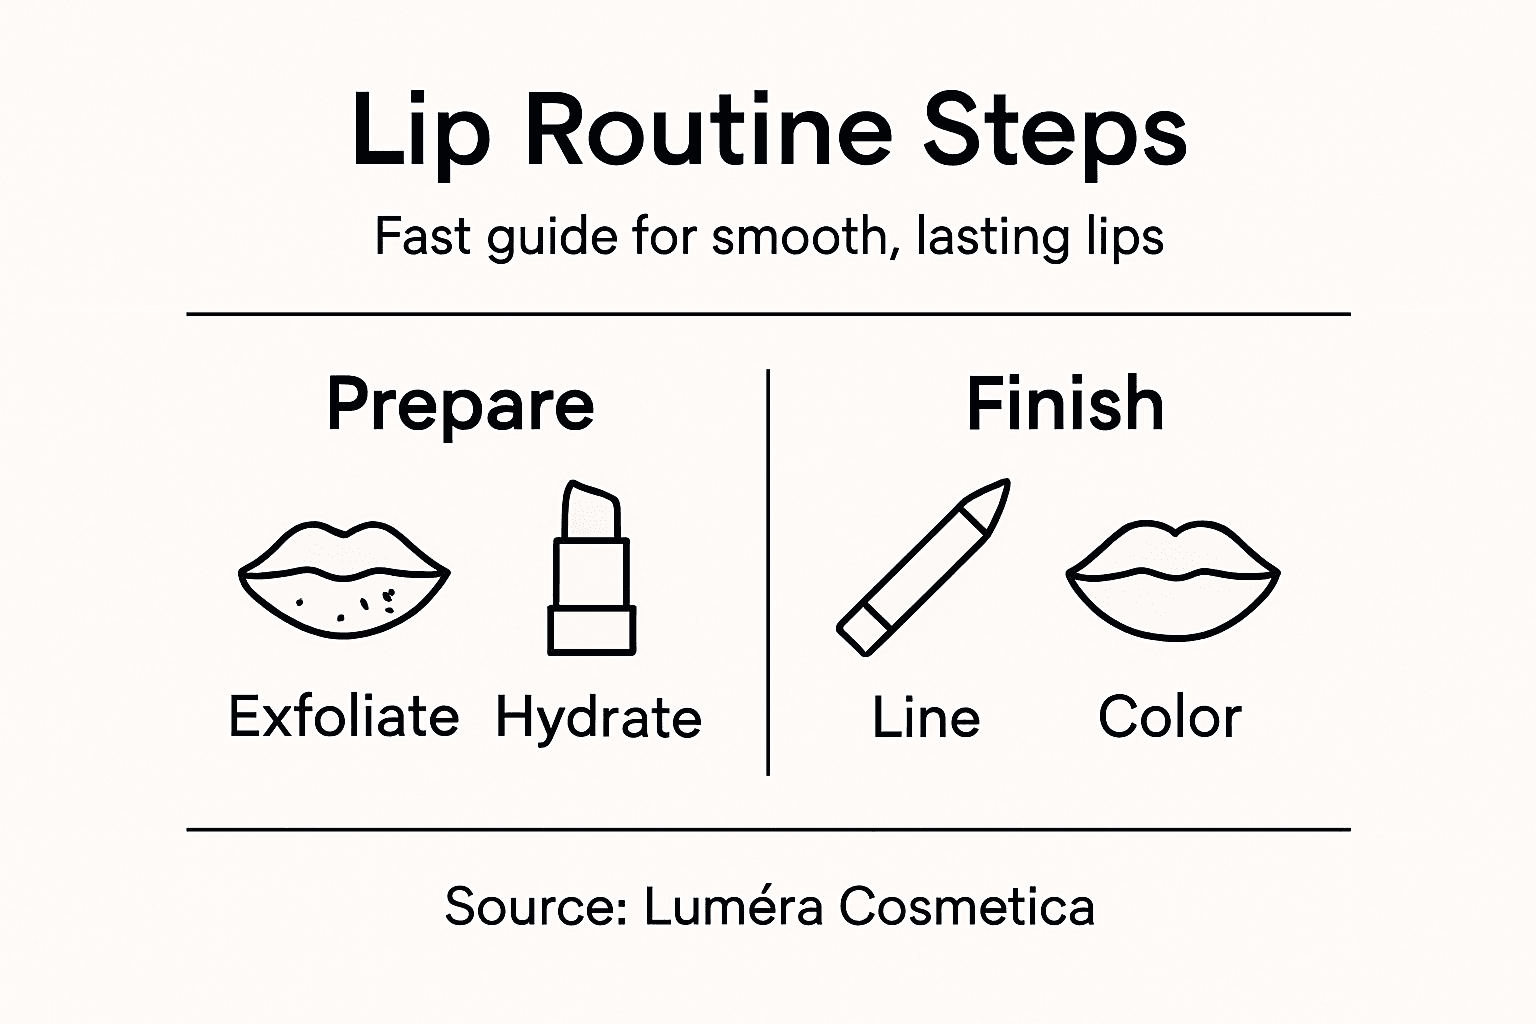
- Step 1: Prep and Smooth Lips
- Step 2: Define Shape with Lip Liner
- Step 3: Fill In with Color for Lasting Impact
- Step 4: Add Shine or Set for Duration
- Step 5: Check and Perfect Your Look
Quick Summary
| Key Point | Explanation |
|---|---|
| 1. Prepare Lips for Makeup | Exfoliate and hydrate your lips before applying any color to ensure a smooth, flawless base that lasts throughout the day. |
| 2. Use Lip Liner for Definition | Apply lip liner for precise shape and to prevent color bleeding, enhancing the overall look of your lip makeup. |
| 3. Layer Lip Color for Longevity | Build lip color in thin layers, blotting between applications to lock in pigment and enhance lasting power. |
| 4. Choose Appropriate Finishing Products | Select gloss or setting powder based on desired finish, applying sparingly for an elegant, professional look. |
| 5. Assess and Perfect Your Makeup | Do a final check with different lighting to ensure symmetry and even color application, making small adjustments as needed. |
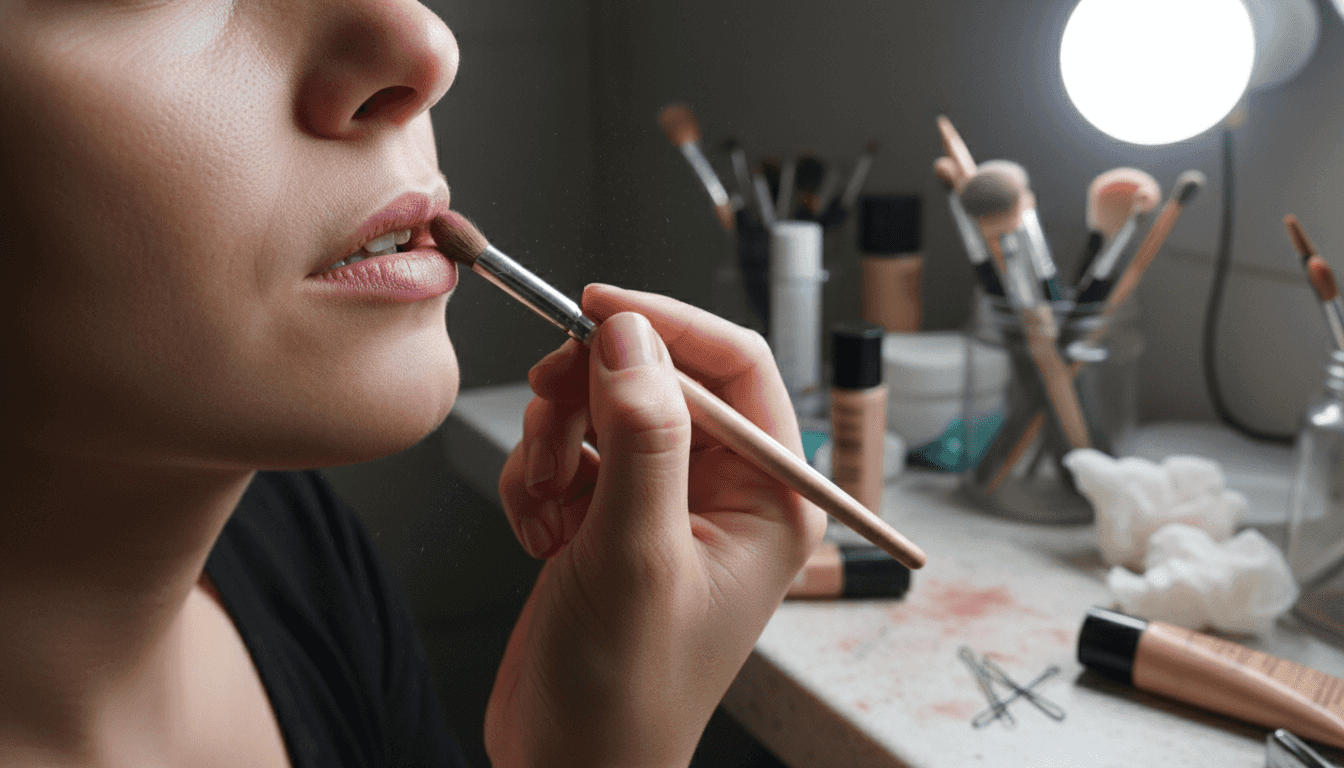
Step 1: Prep and Smooth Lips
Beautiful lip makeup starts with a smooth, hydrated foundation. Before applying any color or product, proper lip preparation ensures your look stays flawless and comfortable throughout the day.
To create the perfect lip canvas, focus on gentle exfoliation and deep hydration. Start by using a soft lip scrub or clean toothbrush to remove dead skin cells. Circular motions help slough away dry patches, revealing softer, smoother lips ready for makeup application. Lip enhancement techniques emphasize the importance of creating a smooth base.
Hydration is key to maintaining lip health and creating a perfect makeup base. Apply a nourishing lip balm that:
- Contains natural oils and moisturizing ingredients
- Creates a protective barrier against environmental damage
- Smooths and softens lip texture
- Provides long-lasting hydration
When selecting a lip balm, look for protective ingredients that lock in moisture. Allow the balm to absorb completely before proceeding with lip liner or lipstick application.
Pro tip: Apply lip balm at least 5-10 minutes before makeup to ensure complete absorption and create the perfect smooth canvas.
Step 2: Define Shape with Lip Liner
Mastering lip liner application is your secret weapon for creating perfectly defined, symmetrical lips that look naturally polished. Lip liner techniques help prevent color bleeding and create the illusion of fuller, more refined lips.
To achieve professional results, start by understanding your unique lip shape. Analyze your natural lip line carefully and choose a lip liner that closely matches your lipstick shade. When tracing your lips, follow these key strategies:
- Hold the lip liner at a 45-degree angle for precise control
- Begin at the center of your upper lip, tracing the cupid’s bow
- Work outwards toward the corners of your mouth
- Use short, gentle strokes to create a natural-looking definition
Understanding lip shape variations allows you to customize your technique. For thinner lips, slightly overline just beyond your natural vermilion border to create the appearance of fullness. For asymmetrical lips, focus on creating balance and evening out the shape.
Precision is key: Lip liner serves as the architectural blueprint for your entire lip makeup look.
Blending is crucial for a seamless, natural finish. After outlining, use a lip brush or your fingertip to softly blur the liner’s edges, ensuring no harsh lines are visible. This technique creates a soft, diffused border that looks effortlessly elegant.
Pro tip: Sharpen your lip liner pencil before each use to maintain a crisp, clean line and prevent uneven application.
Step 3: Fill In with Color for Lasting Impact
Transforming your perfectly lined lips into a stunning, long-lasting statement requires strategic color application. Color additives in cosmetics are carefully formulated to provide vibrant, enduring pigmentation that looks flawless throughout the day.
Choose the right lipstick formula that complements your lip liner and personal style. Cream-based lipsticks offer rich color, while matte formulas provide extended wear. When applying color, follow these essential techniques:
- Start from the center of your lips and move outwards
- Use a lip brush for precise application
- Apply in thin, even layers for maximum color payoff
- Blend carefully within the lip liner boundaries
Professional secret: The key to lasting lip color is building layers, not flooding your lips with product.
Lip color longevity techniques reveal that strategic application matters. After the first layer, gently blot with a tissue to remove excess product. Then, apply a second thin layer to lock in color and create a more intense, long-lasting finish.
For additional staying power, consider using a coordinating lip liner as a base or applying a translucent setting powder between color layers. This technique helps create a barrier that prevents color bleeding and extends wear time.
Here is a comparison of popular lipstick finishes and their distinct benefits:
| Finish Type | Appearance | Wear Time | Ideal For |
|---|---|---|---|
| Matte | Bold, no shine | Long-lasting | All-day wear, precision |
| Cream | Soft, natural sheen | Moderate | Everyday, comfortable use |
| Gloss | High shine, reflective | Short to moderate | Added volume, touch-ups |
| Satin | Subtle sheen, smooth | Moderate-Long | Balanced comfort + impact |
Pro tip: Keep a small lip brush and your chosen lipstick in your purse for quick touch-ups throughout the day.
Step 4: Add Shine or Set for Duration
The final touch to your lip makeup routine transforms a good look into a stunning, professional finish. Lip balms and glosses offer multiple options for sealing and enhancing your lip color with a gorgeous, long-lasting effect.
Select your finishing product based on the look you want to achieve. For a high-shine effect, opt for a clear gloss. For a more sophisticated, set appearance, choose a lightweight setting powder or clear lip sealant. Consider these application techniques:
- Apply gloss sparingly to the center of your lips
- Use a small brush for precise setting powder application
- Blot gently after applying to remove excess product
- Focus on maintaining the color’s integrity
Professional insight: Less is more when setting your lip color - subtle touches create the most elegant results.
Dermatologist-recommended lip protection suggests choosing products with hydrating ingredients like petrolatum or ceramides. These not only set your makeup but also provide essential moisture to keep your lips looking smooth and healthy.
For maximum durability, consider using a two-step setting approach. First, apply a thin layer of translucent powder over your lipstick. Then, follow with a light application of lip gloss or setting spray to lock in color and add a subtle, professional sheen.
Pro tip: Carry a small lip touch-up kit with a mini gloss and compact mirror for quick midday refreshes.
Step 5: Check and Perfect Your Look
Your lip makeup journey culminates in the critical final review that transforms a good application into a flawless, professional finish. Professional makeup artists emphasize the importance of meticulous assessment to ensure a polished, refined appearance.
Assess your lip makeup from multiple perspectives to catch subtle imperfections. Use a combination of lighting and mirrors to evaluate your look critically. Key areas to examine include:
- Symmetry of lip liner and color application
- Color intensity and even distribution
- Blending at lip edges
- Overall balance with your entire makeup look
Perfection is in the details: A careful final check can elevate your lip makeup from good to extraordinary.
Look for potential touch-up areas by examining your lips in natural and indoor lighting. Soft, natural light provides the most accurate representation of your makeup. Use a magnifying mirror to check for:
- Uneven color patches
- Liner bleeding or smudging
- Areas needing slight blending
- Excess product buildup
Gently correct any minor imperfections with a clean lip brush or a small cotton swab. Subtle adjustments can dramatically improve your overall lip makeup presentation.
The following table summarizes expert tips for achieving flawless lip makeup at every step:
| Step | Common Mistake | Expert Correction Tip |
|---|---|---|
| Prep and Smooth | Neglecting exfoliation | Gently buff lips before balm |
| Define with Lip Liner | Unblended harsh liners | Soften edges with gentle blending |
| Fill In with Color | Thick, uneven layers | Apply thin, even layers, blot |
| Finish and Set | Overusing gloss/powder | Apply product sparingly, focus center |
| Check and Perfect | Skipping final check | Use varied lighting, magnifying mirror |
Pro tip: Keep a small makeup repair kit with a lip brush, cotton swabs, and matching lip liner for quick, precise corrections throughout the day.
Achieve Effortless Lip Perfection with Luméra Cosmetica
Struggling to find a quick and reliable lip makeup routine that keeps your lips smooth, defined, and vibrant all day Our simple steps for prepping, defining, coloring, and setting lips are essential but finding the right products to support these techniques makes all the difference. Experience the power of hydration and lasting color with our specially formulated LIP OIL – Luméra Cosmetica designed to nourish your lips before and after makeup application.
Elevate your daily beauty routine by visiting Luméra Cosmetica and explore our curated collection for a flawless finish. Complement your look with products from our Face Makeup for Every Skin Type | Natural Radiance by Luméra Cosmetica collection to create harmonious, radiant results. Now is the perfect time to transform your lip care and makeup application with expert-approved solutions crafted just for you. Shop today and master the quick lip makeup routine that delivers effortless beauty results.
Frequently Asked Questions
How do I prep my lips for makeup?
Start by gently exfoliating your lips using a soft lip scrub or a clean toothbrush to remove dead skin cells. Follow this by applying a nourishing lip balm and allowing it to absorb for about 5-10 minutes before continuing with your lip liner and lipstick.
What technique should I use for applying lip liner?
Use a 45-degree angle when holding the lip liner for better control and precision. Begin tracing from the center of your upper lip, following your natural lip line outward towards the corners for a defined shape.
How can I ensure my lipstick lasts all day?
Apply lipstick in thin layers rather than one thick coat to enhance longevity. After the first application, gently blot your lips with a tissue and then apply a second layer for a more intense color that lasts longer.
What is the best way to add shine to my lips?
Apply a clear gloss sparingly to the center of your lips for a high-shine effect or opt for a lightweight setting powder if you prefer a more sophisticated look. Use small amounts and blot gently to avoid excess product buildup, ensuring a polished finish.
How do I check my lip makeup for perfection?
Examine your lips in various lighting, including natural light, to identify any uneven areas. Use a magnifying mirror to spot subtle imperfections, and make minor corrections with a clean lip brush or cotton swab for a flawless appearance.